Laying up carbon fibre

4GTuner

Help Support 4GTuner:

rob323

Don't drive it, RALLY it!
Joined
Dec 4, 2005
Messages
2,517
Location
Joyner, Brisbane.
Anyone else here played with laying up carbon fibre?
I need to make a light pod for my rally car and the easiest way I can think of, without having to make a mould and vacuum bag it is as follows:
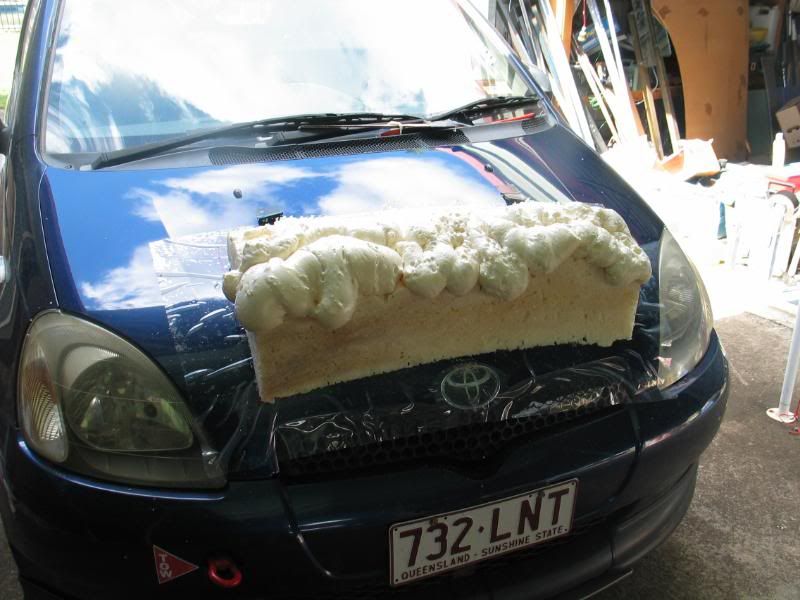
Make a foam plug and shape it to the final shape.
Stretch some flexible material over it and coat the material in epoxy resin to hold the shape and to seal the foam.
Then put a layer or two of carbon fibre mat on top and and brush in the epoxy resin.
The flip it upside down and scrape out the foam from inside.
then layer up some fibre glass (or more carbon) on the inside til I gain the required strength.

Any thoughts as to whether it will work?
 
Do you want the grain to be even?

You'll need to pretend you are wrapping it with vinyl.

Also, make sure the layer under the carbon is black otherwise you'll be able to see through it.
 
To save yourself some money and a little effort (cf is stiff to lay up and wont conform to tight corners) use plain fiberglass underneath. Then use a little pigment to colour the resin black. Ive been told that 'Dulux Ultra Deap Base' pigment from auto shops work well for pigment too, without contaminating the mix.

I know you want to do it the easiest way, but I would think making plugs/female moulds would end up with a better result. Instead of trying to get it right on the first go you have a few chances to rectify minor flaws along the way.

Shape some foam to the rough shape, seal it with paint etc, then get some clay to finish off the desired shape. If bonnet mounted, try to get the shape off the bonnet too maybe. Stay away from tight internal corners as they will not push in without continual force applied (ie bagging).

When dried, wax it with release mould. I use decent quality canuba wax as its a little cheaper. Use small amounts at a time to get really light coats, at least 5. Keep the wax at a decent warm room temp to make it spread easier. Allow a decent time for each coat to dry. For me its I do one coat a night. Make sure this is pefectly smoothe as CF is a bitch to sand. You only want to have to sand the outer dried resin coat (if not using gelcoat) really, really lightly with high grit paper at the end.

Now depending on the shape and whether or not there are undercuts, will determine if you need to use a silicone mould or if a fiberglass one is sufficient. Use a light chopped strand first to conform to the shape. Then maybe heavier to speed up the rest of the lay up. Always get the air bubbles out between each layer.

If skipping the gelcoat stage in the final lay up, maybe get your resin ready in small cups (bigger cups create more heat and will set the pot off quicker) and mix a small batch first. Keep the hardener ready until the last minute. Watch and wait for this to gel a little. Not too much, just enough that it the consitency is not too runny. This will it too stick to the sides of the mould better and not run to the bottom too fast and allow you to get the first layer down to the edges better. Try not stretch it too much as the strands will easily sepperate and look crap. Without bagging it, CF is only used for looks. There will be too much resin in it to give the weight saving advantage. Therefore just use chopped strand of light weave fiberglass for the rest.

I have made a vacuum beg set up with an old fridge compressor that I use to lay up snowboards with 540 gsm triaxial and epoxy resin. I have to get around to welding up my pneumatic press with 6" lay flat hose. Woven glass is nowhere near as strong as dirctional because the strands are woven up and down through each other. When under load it straightens out giving it more stretch and no stiffness. Directional are layed straight in various orientations on top of each other. I use 0, 45, 45 giving strength down the board and torsional twist.

If there are any imperfections left that might give you grief sanding, mix a little resin to touch up, then sand.
 
Paul said:
Do you want the grain to be even?
Not really, it would be pretty hard I imagine to do so once you start pulling it around compound curves.

Also, make sure the layer under the carbon is black otherwise you'll be able to see through it.
Good point, thanks.

Legume said:
To save yourself some money and a little effort (cf is stiff to lay up and wont conform to tight corners) use plain fiberglass underneath.
Yep, that's the plan, the carbon fibre outer layer is really more for show (omg, did I really say that?) with the fibreglass underneath incorporating bracing and places to tie the hid ballasts.


I know you want to do it the easiest way, but I would think making plugs/female moulds would end up with a better result. Instead of trying to get it right on the first go you have a few chances to rectify minor flaws along the way.
I agree, and I'm starting to think that I should take my time and do it properly, at least if I make a mould, I will be able to replicate it alot easier if/when I smash this one.

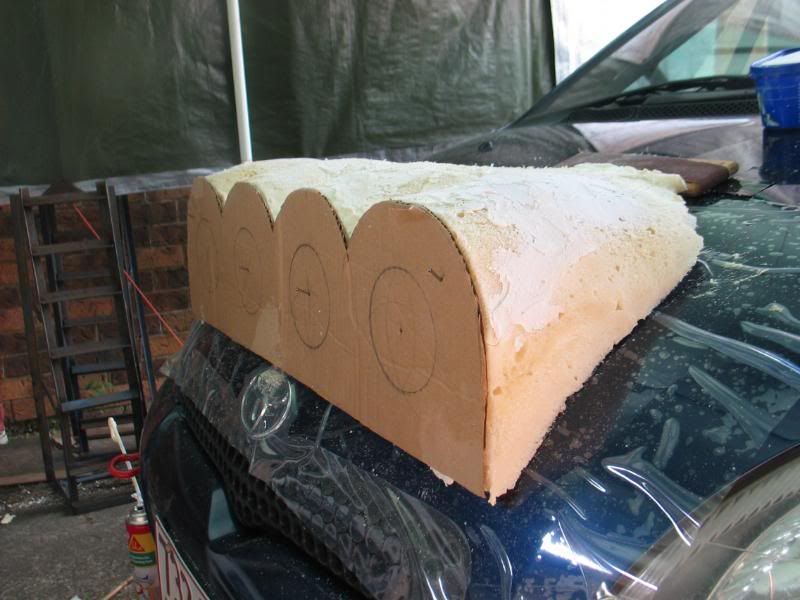
This is my progress so far over the weekend, still alot of shaping to go but the general concept is there.

IMG_7201.jpg

IMG_7205.jpg
 
Legume is right.

If you want cfrp and gfrp to last it needs to be structural. To achieve this you need:

1. No voids (ie air)
2. Fibre to resin ratio no less than 50/50
3. Curing under compression (pressure) and vacuum at the correct temp (around 120)

If you layup the fibre with resin and cure at room temp - this has the lowest strength and stiffness and most spoilers and shit are done this way (the main reason they don't last - one hit and they fracture).

The best way is laying up a very good quality continuous fibre in resin and wetting agent (acetone) then partially curing at temp. This forms a sheet called a PREPREG. Then you create a laminate of these PREPREG sheets in various orientations to suit the imposed loads of your part. Then the tricky part - you have to compress the hell out of it (under vacuum) to remove voids and as much resin as possible at a constant temperature (120) for 30 mins to achieve full curing.

The end result is a component (that's if your QC is right) will be formula 1 in quality, strength and stiffness.

I did my thesis on fibre reinforced composite manufacture and testing and this was the technique we used.
 
lozza said:
Legume is right.

If you want cfrp and gfrp to last it needs to be structural. To achieve this you need:

1. No voids (ie air)
2. Fibre to resin ratio no less than 50/50
3. Curing under compression (pressure) and vacuum at the correct temp (around 120)

If you layup the fibre with resin and cure at room temp - this has the lowest strength and stiffness and most spoilers and shit are done this way (the main reason they don't last - one hit and they fracture).

The best way is laying up a very good quality continuous fibre in resin and wetting agent (acetone) then partially curing at temp. This forms a sheet called a PREPREG. Then you create a laminate of these PREPREG sheets in various orientations to suit the imposed loads of your part. Then the tricky part - you have to compress the hell out of it (under vacuum) to remove voids and as much resin as possible at a constant temperature (120) for 30 mins to achieve full curing.

The end result is a component (that's if your QC is right) will be formula 1 in quality, strength and stiffness.

I did my thesis on fibre reinforced composite manufacture and testing and this was the technique we used.

Ok, but in this case, the carbon is not structural, nor is the pod for that matter, nor can I fit the pod in my oven :unsure:.
Bought some air drying moulding clay today to do the final shaping with though.
 
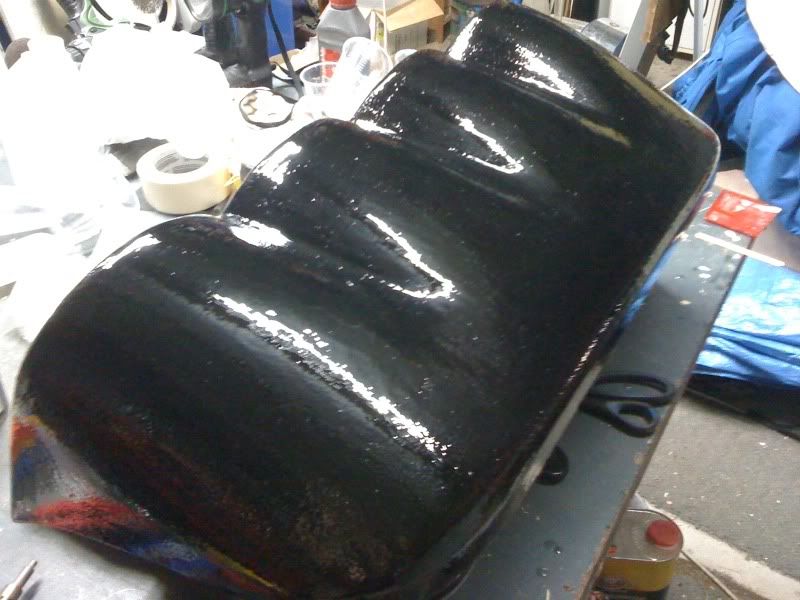
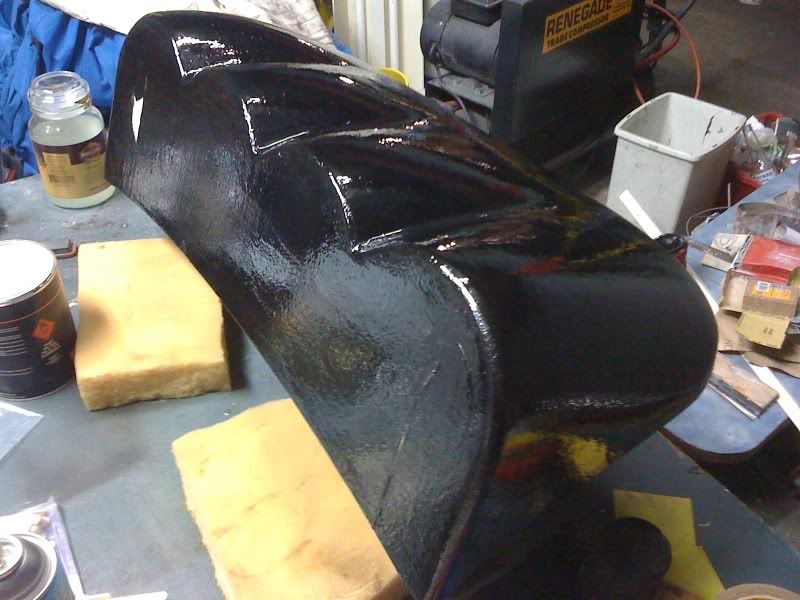
Just to update this, the plug has now been finished. Wrapped in black speaker grille cloth and epoxy resin.

iphonephotos031.jpg

iphonephotos032.jpg

iphonephotos030.jpg


The high spots have now been sanded off and it's ready for a layer of carbon.
I've got some vacuum bagging film, peel ply and breather fabric and have modified my air compressor to be an air sucker.
Did a test last night and pulled a vacuum of 25 inch Hg and it held it overnight as well which was suprising.

Saturday is going to be "D" day for the carbon fibre layer. Fingers crossed I don't f*ck it up too much.
If this works, door cards will be next on the agenda :D
 
good work mate, IMO turned out pretty fken sweet. Pretty good idea with the 'wrapping cloth+resin around the expanded foam shape' although if making body panels there'd be still alot of work to get the plug as smooth as possible.

Also, innovative to mod the air compressor to work as a vacuum pump! :lol:
 
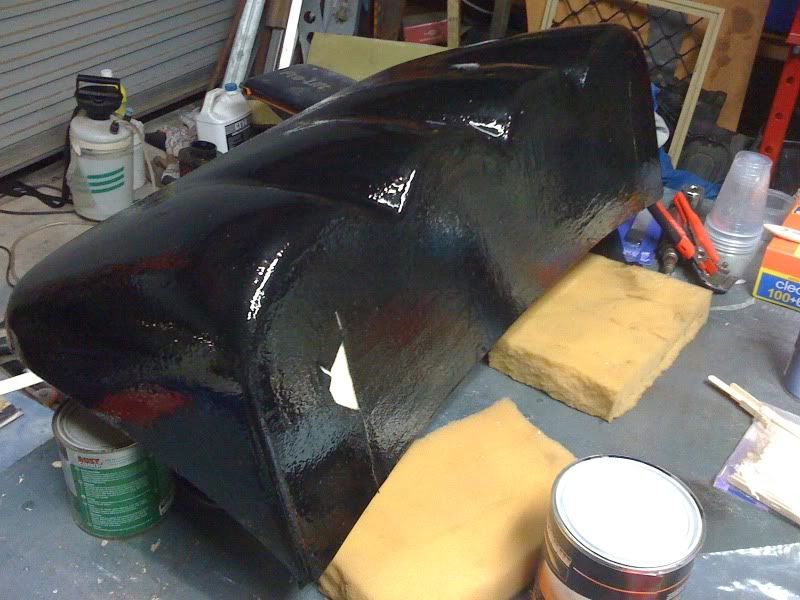
Now got a couple of extra coats of resin, almost ready for sanding smooth and clear coating. I've added a shelf inside the pod now to strap the HID ballasts to. Still yet to add angle brackets to allow the pod to be bolted to the bonnet. Hopefully this weekend will see it finished and ready for the rally on the following weekend.

iphonephotos045.jpg

iphonephotos046.jpg

iphonephotos044.jpg


All in all, for my first crack at it, it's gone bloody well. There's a few things I would do differently next time to make it better again. Can't wait to get stuck into the door trims now.
 
I'M SICK OF SANDING :angry:

Block sanded the resin back to "almost" perfectly smooth. I couldn't get it any better as I hadn't built up enough thickness of resin and had almost gone through it in some places.

iphonephotos048-1.jpg

iphonephotos049.jpg


The carbon/ fibreglass reinforced balsa shelf inside to attached the HID ballasts to:

iphonephotos050-1.jpg


Then time to get high (and deader) on 2 pack fumes again. Sexy Time! :p

iphonephotos051.jpg

iphonephotos052.jpg

iphonephotos053.jpg

iphonephotos054.jpg
 
Nice work Rob real pro looking GL on the rally & don't forget to slow down in the slippy calls ;)
 
This is the finished product. Ended up with a heap of fish eyes in the bloody clear coat for some reason :unsure: .
The rally got cancelled due to the weather so all my hard work will have to wait for next year to be tested.
But I'm definately going to have a crack at some door trims int he new year now.

iphonephotos065.jpg
 

Latest posts

Back
Top