Seam Welding Engine Bay in EVO1-3

4GTuner

Help Support 4GTuner:

ENGINR

Wannabe Racer
Joined
Nov 6, 2005
Messages
5,061
Location
Melbourne
Whilst the Coupe is at the panel beater having the engine bay refreshed, I figured it was as good a time as any to have some seam welding done in some critical areas (passenger side engine mount for example). I already have the EVO strut tower to firewall reinforcement plates welded in - is there anything else that can be done in addition to this?

Where else have you guys done/seen this in the engine bay?

Cheers,
Shayne
 
I noticed when i removed the K frame, there doesnt seam to be alot of welds on it

Also 1 of the guys around here welded in a solid bar from strut tower to the firewall lip then to the other strut tower, for extra strength in his awd coupe

I'll try to get a pic when i see it next
 
welding around the chassis rails where the rails intersects with the A pillar under the car will pay dividends in chassis rigidity. move up from there into the bay proper. try to weld all of the multi layer joints along the chassis rail. if the guards are off ....do the top rail at he same time.

I did my green car in the front and it made a loads of difference but needed to do the rear as well to get the maximum effect....have done the back of the evo 1 and that is also very good as it make the rear very flickable. I also did some stiffening/ bracing to the rear cross member.
 
Yeah seam welding all the engine bay seams Is a great idea, I'd suggest you do the whole length of the rails and all the rear end too... But thats another story

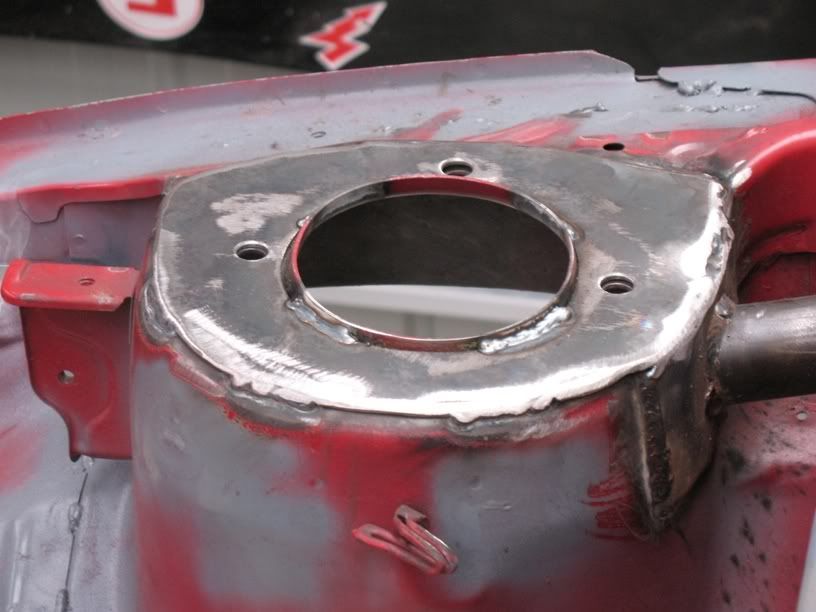
I plated the strut tops..
IMG_0513.jpg


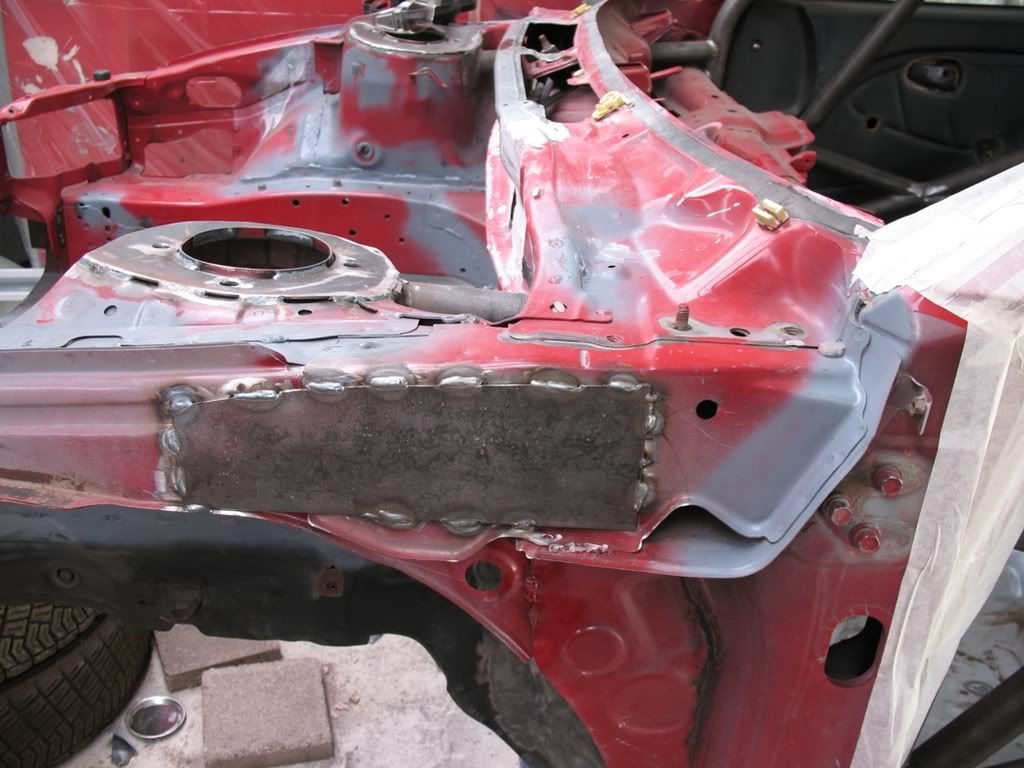
And also put a plate here... As our old chassis got bad cracking through there..
IMG_0576.jpg


Make sure you wire wheel out the seam sealer before welding do the welds do get contaminated and look crap :p
 
I noticed when i removed the K frame, there doesnt seam to be alot of welds on it

Also 1 of the guys around here welded in a solid bar from strut tower to the firewall lip then to the other strut tower, for extra strength in his awd coupe

I'll try to get a pic when i see it next


welding around the chassis rails where the rails intersects with the A pillar under the car will pay dividends in chassis rigidity. move up from there into the bay proper. try to weld all of the multi layer joints along the chassis rail. if the guards are off ....do the top rail at he same time.

I did my green car in the front and it made a loads of difference but needed to do the rear as well to get the maximum effect....have done the back of the evo 1 and that is also very good as it make the rear very flickable. I also did some stiffening/ bracing to the rear cross member.


Yeah seam welding all the engine bay seams Is a great idea, I'd suggest you do the whole length of the rails and all the rear end too... But thats another story

I plated the strut tops..


And also put a plate here... As our old chassis got bad cracking through there..


Make sure you wire wheel out the seam sealer before welding do the welds do get contaminated and look crap :p


Awesome stuff guys, thanks!

The front of the car is completely bare (no guards, bonnets etc) so the panel beater has told me to just mark out where I want the welding done and he'll have a go at it.
 
dont do a full seam weld, as it stresses the steel and it mkes the car completely unrepairable (if you have a small prang, it bends and you cant pull it back) do inch on inch off
 
Out of interest, did you use any surface treatment/primer inbetween your strut top and welded plates prior to welding? e.g. any form of corrosion protection inbetween the two?
 
Here's a CC coupe with a cool brace welded in. This had suffered from cracks in the firewall that all CC Lancers suffer from, except EVO's due to their extra welding and braces.
I reckon this turned out good but Im not entirely sure if there's enough rigidity in the firewall where its been welded - its just a shallow skin to catch water under the wipers but it could do the trick.
I only have the strut braces and fender braces in my coupe (see pic) and I'll see if they work, so far so good.
But if there is any sign of cracking, I'll be looking at doing similar to Evo or the pics Ive attached in conjunction with the strut & fender braces.
 

Attachments

  • Brace 1.jpg
    Brace 1.jpg
    146 KB
  • Brace 2.jpg
    Brace 2.jpg
    85.2 KB
  • EVO-00X Fender Brace.JPG
    EVO-00X Fender Brace.JPG
    126.9 KB
normally you use a good weld through primer, this stops corrosion between the welds. also fish oil is handy.
most cars that are seam welded or have bars welded in are non repairable, so any collision may reguster the car useless as it is too rigid to bend back. most amature rally teams inch on inch off weld the car and make the bracing in th efront removable in case th echassis needs to be pulled
 
I wouldn't bother mate! Just order a pair from Ultra racing and they are here within the week - powdercoated and ready to install!

$$$ vs time
 
Sigh,
Clutch firewall flexing and cracking is the other one!

My cars out until I get the sandwich plate done!!

Anyone else done Mikey's fix?

Or something similar?
 

Attachments

  • IMG_3871.JPG
    IMG_3871.JPG
    139.5 KB
  • IMG_3870.JPG
    IMG_3870.JPG
    142.7 KB
From memory there was a pretty good thread on the old Evocoupe forum on this. I wonder if Rob still has any of it?
Not that it helps you, but in one of my front cuts the clutch pedal had been modified in this way; so they have obviously been doing this in Japland for some time. The plate wasn't as thick but method was the same.
 
My solution was to have the bosses ground off the mounting studs and have another two studs welded into the pedal box face (so now I have 4x studs clamping the face to the firewall.

I then had a spacer block made up from aluminium that is the same thickness as the bosses but covers the whole face of the pedal box, so now the load is being distributed through the whole surface area of the pedal box face and not just two concentrated points.

I used another piece of firewall to sit between the original firewall and my spacer block so I have effectively doubled the firewall thickness.
 

Latest posts

Back
Top