lol @ fanta ...
sounds like its going to look great after the makeover!
Welcome to 4GTuner
Register now to gain access to all of our features. Once registered and logged in, you will be able to create topics, post replies to existing threads, give reputation to your fellow members, get your own private messenger, post status updates, manage your profile and so much more. If you already have an account, login here - otherwise create an account for free today!
Register now to gain access to all of our features. Once registered and logged in, you will be able to create topics, post replies to existing threads, give reputation to your fellow members, get your own private messenger, post status updates, manage your profile and so much more. If you already have an account, login here - otherwise create an account for free today!
Josh's EVO 2 Converted GSR
Started by 91LTI, May 28 2009 12:41 AM
#21

 Posted 20 July 2009 - 05:50 AM

Dan | Melbourne | 1994 CD5A / CE9A / E39A bastard child
special thanks to - TRIKFAB | Tropic Motors | Springy Motors

special thanks to - TRIKFAB | Tropic Motors | Springy Motors

#22

 Posted 20 July 2009 - 07:20 AM

I was gonna call him sunkist but fine Fanta will do 
Gonna look awsome Josh (FANTA)
The EVO4 seats arnt suede, i dont think.. but never the less it will suit the paint 100%
http://img.photobuck...pg?t=1248074290
http://www.japworld.... 4 blue 007.jpg
http://members.iinet...recaro-rear.JPG
Gonna look awsome Josh (FANTA)
The EVO4 seats arnt suede, i dont think.. but never the less it will suit the paint 100%
http://img.photobuck...pg?t=1248074290
http://www.japworld.... 4 blue 007.jpg
http://members.iinet...recaro-rear.JPG
------------ 4GTUNER STICKERS - CLICK HERE ------------

------------------------- 4G63T AWD COUPE -------------------------
----------------------- WWW.EVOCOUPE.NET -----------------------

------------------------- 4G63T AWD COUPE -------------------------
----------------------- WWW.EVOCOUPE.NET -----------------------
#23

 Posted 20 July 2009 - 07:34 AM

oh yeah ok I thought just the bolsters on the fronts were some sort of suede crap.. ah well either way I'll just find something to match it.
those are the seats I'm after hey, that second pic the interior is fkn mint.
those are the seats I'm after hey, that second pic the interior is fkn mint.
#24

 Posted 29 July 2009 - 09:58 AM

well got the new bar and rear pods painted over the weekend, picked it up and put it back on the car last night...
it came up really good im pretty happy with it.
I've just given it a quick cut and polish but need to go over it properly on the weekend.
check my crappy pics..
other than this, the front lip and the roof are the only things to be getting painted soon, then it will stay like this until next year until the whole car gets painted.


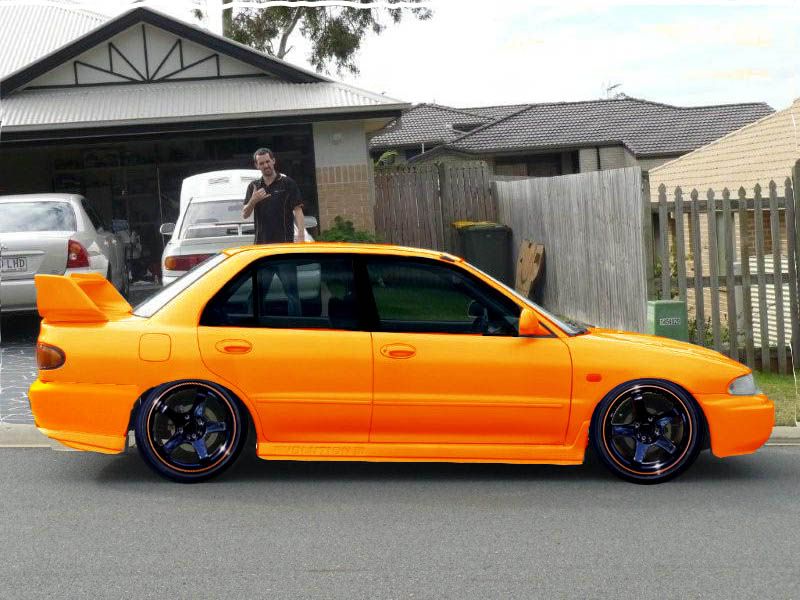
Also just did a quick chop of what i'm thinking of doing with the car...
- Orange paint
- gloss black Drifteks with orange pinstripe
- dark tint
Thoughts?
it came up really good im pretty happy with it.
I've just given it a quick cut and polish but need to go over it properly on the weekend.
check my crappy pics..
other than this, the front lip and the roof are the only things to be getting painted soon, then it will stay like this until next year until the whole car gets painted.


Also just did a quick chop of what i'm thinking of doing with the car...
- Orange paint
- gloss black Drifteks with orange pinstripe
- dark tint
Thoughts?

#25

 Posted 29 July 2009 - 10:58 AM

yummy  :drool:'
I would of gone a hot colour like the lambo orange but
A) didnt want to look like Agent Orange (which is a friggen immaculate build)
 didint want the police attention down here
I would of gone a hot colour like the lambo orange but
A) didnt want to look like Agent Orange (which is a friggen immaculate build)
Dan | Melbourne | 1994 CD5A / CE9A / E39A bastard child
special thanks to - TRIKFAB | Tropic Motors | Springy Motors

special thanks to - TRIKFAB | Tropic Motors | Springy Motors

#26

 Posted 30 July 2009 - 01:23 AM

#27

 Posted 30 July 2009 - 05:12 AM

#28

 Posted 30 July 2009 - 06:14 AM

Drifteks look the shit i have been thinking the past week of getting some of these..however i want 16's and not 100% sure if you can get them in 16's?? correct me here if i'm wrong
FORBIDDEN PERFORMANCE
0433 245 136
Rides:
'95 Genuine Evo III - 310kw - 11.2 @ 129mph SOLD
'95 Lancer GSR - 340kw - 10.8 @ 129mph SOLD
0433 245 136
Rides:
'95 Genuine Evo III - 310kw - 11.2 @ 129mph SOLD
'95 Lancer GSR - 340kw - 10.8 @ 129mph SOLD
#29

 Posted 15 August 2009 - 10:49 PM

Ok, well had a good day yesterday getting started on repairing the rust in the roof, and also the rust in the spare wheel well, and some repairs to the drivers side tail light surround, where old mate before me has backed into something (why I had to replace the rear bar).
Anyway, went to SuperCheap and bought some rust converter, body filler, fibre glass filler, sand paper etc.
SORRY FOR ALL THE PICS
Here is some pics of the roof before we started....


The front part near the windscreen is by far the worst section of rust, so we thought we'd concentrate on this first.
After we took out the roof lining, it was pretty clear how bad it actually was...


Next we go to starting to grind back the rust with a steel wheel on the drill.


We decided to use an angle grinder to cut back more of the rust, as the steel wheel wasn't really getting deep down.
fkn grind somethin... lol


As you can see, the holes from the rust were pretty big....


this was the first stage out of the way...


Next up I got to using the drill again with a sanding wheel this time to smooth back everything before we put some fibre glass filler on.


As you can see, the holes were nasty...


This is the shit that fell from the inside...

Next up we put on some rust converter to treat the remaining metal and rust on the roof, and on the underside of the roof.


Pretty much ready for the fibre glass filler now...

http://i3.photobucke... Repair/085.jpg
Then we mixed up the fibre glass filler and slapped it on...
http://i3.photobucke... Repair/088.jpg
http://i3.photobucke... Repair/089.jpg
http://i3.photobucke... Repair/090.jpg
Once we let it harden up, we realised that we put a bit too much on, and that shit sets HARD lol. Sets much harder than normal body filler thats for sure!
I had the fun job of sanding it all back.... Dion you kent lol
http://i3.photobucke... Repair/097.jpg
http://i3.photobucke... Repair/098.jpg
http://i3.photobucke... Repair/093.jpg
http://i3.photobucke... Repair/094.jpg
http://i3.photobucke... Repair/099.jpg
http://i3.photobucke... Repair/101.jpg
http://i3.photobucke... Repair/112.jpg
http://i3.photobucke... Repair/114.jpg
Fkn Mistubishi junk yard.... lol
http://i3.photobucke... Repair/095.jpg
After it was all sanded back, it was starting to get dark and cold, so we decided to just finish up with painting that section of the roof in black paint just to seal it up and we could then leave it to finish off the rest of the roof over the next couple weeks.
http://i3.photobucke... Repair/116.jpg
http://i3.photobucke... Repair/118.jpg
http://i3.photobucke... Repair/122.jpg
http://i3.photobucke... Repair/124.jpg
http://i3.photobucke... Repair/124.jpg
http://i3.photobucke... Repair/128.jpg
http://i3.photobucke... Repair/130.jpg
This is pretty much where we left it last night. Doesn't look the best with the black just at the front of the roof, but I'm not fussed we'll get the rest of the roof done asap.
Anyway, went to SuperCheap and bought some rust converter, body filler, fibre glass filler, sand paper etc.
SORRY FOR ALL THE PICS
Here is some pics of the roof before we started....


The front part near the windscreen is by far the worst section of rust, so we thought we'd concentrate on this first.
After we took out the roof lining, it was pretty clear how bad it actually was...


Next we go to starting to grind back the rust with a steel wheel on the drill.


We decided to use an angle grinder to cut back more of the rust, as the steel wheel wasn't really getting deep down.
fkn grind somethin... lol


As you can see, the holes from the rust were pretty big....


this was the first stage out of the way...


Next up I got to using the drill again with a sanding wheel this time to smooth back everything before we put some fibre glass filler on.


As you can see, the holes were nasty...


This is the shit that fell from the inside...

Next up we put on some rust converter to treat the remaining metal and rust on the roof, and on the underside of the roof.


Pretty much ready for the fibre glass filler now...

http://i3.photobucke... Repair/085.jpg
Then we mixed up the fibre glass filler and slapped it on...
http://i3.photobucke... Repair/088.jpg
http://i3.photobucke... Repair/089.jpg
http://i3.photobucke... Repair/090.jpg
Once we let it harden up, we realised that we put a bit too much on, and that shit sets HARD lol. Sets much harder than normal body filler thats for sure!
I had the fun job of sanding it all back.... Dion you kent lol
http://i3.photobucke... Repair/097.jpg
http://i3.photobucke... Repair/098.jpg
http://i3.photobucke... Repair/093.jpg
http://i3.photobucke... Repair/094.jpg
http://i3.photobucke... Repair/099.jpg
http://i3.photobucke... Repair/101.jpg
http://i3.photobucke... Repair/112.jpg
http://i3.photobucke... Repair/114.jpg
Fkn Mistubishi junk yard.... lol
http://i3.photobucke... Repair/095.jpg
After it was all sanded back, it was starting to get dark and cold, so we decided to just finish up with painting that section of the roof in black paint just to seal it up and we could then leave it to finish off the rest of the roof over the next couple weeks.
http://i3.photobucke... Repair/116.jpg
http://i3.photobucke... Repair/118.jpg
http://i3.photobucke... Repair/122.jpg
http://i3.photobucke... Repair/124.jpg
http://i3.photobucke... Repair/124.jpg
http://i3.photobucke... Repair/128.jpg
http://i3.photobucke... Repair/130.jpg
This is pretty much where we left it last night. Doesn't look the best with the black just at the front of the roof, but I'm not fussed we'll get the rest of the roof done asap.
#30

 Posted 15 August 2009 - 10:49 PM

While we were going at it, we thought we'd make some other repairs as we went...
We needed to repair the tail light surround where old mate before me had backed into something, and fckd the rear bar as well, hence why i had to get a new one...
Also found where the water is getting into the boot...
here are some pics...


fibre glass filled slapped on...

body filler on now nearly ready for paint.
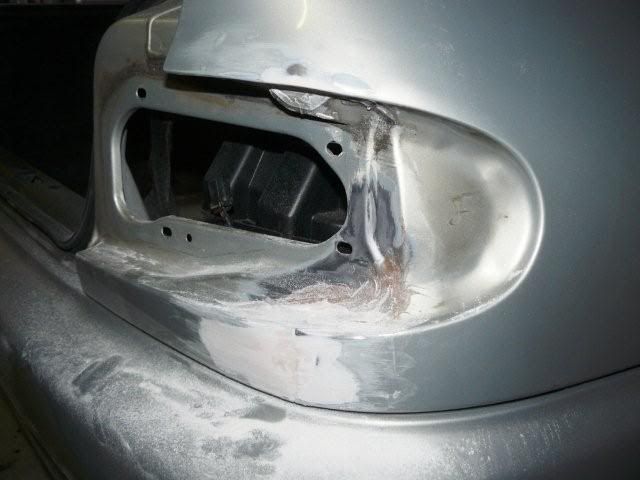

Just need to re do the filler today as there is a low spot.
We needed to repair the tail light surround where old mate before me had backed into something, and fckd the rear bar as well, hence why i had to get a new one...
Also found where the water is getting into the boot...
here are some pics...


fibre glass filled slapped on...

body filler on now nearly ready for paint.


Just need to re do the filler today as there is a low spot.
#31

 Posted 15 August 2009 - 10:50 PM

And lastly, we also used some fibre glass filler in the spare wheel well, as it was rusted to the shit...
We had already gone through with heaps of rust converter.


We put down a layer of glass filler first, then laid on some small sheets of fibre glass matting for added strength, then put one more layer of glass filler over the top. This will also be done on the underside of the car for peace of mind. This fcker will be strong now lol.
Finally we will use body filler to smooth out the well before the boot is fully painted in gloss black.


Would like to thank Dion for all his help today as it was a good effort considering we didn't start on the car until after lunch yesterday lol.
Thanks dude.
We had already gone through with heaps of rust converter.


We put down a layer of glass filler first, then laid on some small sheets of fibre glass matting for added strength, then put one more layer of glass filler over the top. This will also be done on the underside of the car for peace of mind. This fcker will be strong now lol.
Finally we will use body filler to smooth out the well before the boot is fully painted in gloss black.


Would like to thank Dion for all his help today as it was a good effort considering we didn't start on the car until after lunch yesterday lol.
Thanks dude.
#32

 Posted 16 August 2009 - 02:18 AM

seems like you've only used fibreglass filler and not the actual resin.. correct me if i'm wrong.
but i've found that is pretty weak.. none the less its the wheel well.
but i've found that is pretty weak.. none the less its the wheel well.
TMAK - JDM Evo 6.5 TME White with stripes - burnzytuned
|MAP shortblock 2.4LR 10.5:1CR|MAP EF3|GSC S2|Ohlins coilovers|Cusco|Endless|Meek|Turbosmart|Spoolin Up|Bosch 2000|Walbro 400|Zeitronix|GM|Kumho|Stock ported intake and exhaust manifolds|
366kws (vdr) @ 2.1bar
Old setup: 280kws (vdr) @ 24psi [email protected]
Previously owned the FRONTN Cordia.
|MAP shortblock 2.4LR 10.5:1CR|MAP EF3|GSC S2|Ohlins coilovers|Cusco|Endless|Meek|Turbosmart|Spoolin Up|Bosch 2000|Walbro 400|Zeitronix|GM|Kumho|Stock ported intake and exhaust manifolds|
366kws (vdr) @ 2.1bar
Old setup: 280kws (vdr) @ 24psi [email protected]
Previously owned the FRONTN Cordia.
#33

 Posted 16 August 2009 - 02:55 AM

Your using fibreglass. Did you consider using a body filler with bits of stainless in it for strength?? I did this on an OLLLDDD mazda, the steel in it worked great, much stronger than using standard filler or fibre glass. But great work so far..
#34

 Posted 16 August 2009 - 11:45 PM

that fibreglass filler is extremely strong. It's basically bog with fibre glass strands all through it and the matting is just used for additional strength.
Looking good Josh, it will be good once we can actually get the roof finished
Looking good Josh, it will be good once we can actually get the roof finished
#35

 Posted 16 August 2009 - 11:58 PM

that rust will just come back (in time)!! 
Dan | Melbourne | 1994 CD5A / CE9A / E39A bastard child
special thanks to - TRIKFAB | Tropic Motors | Springy Motors

special thanks to - TRIKFAB | Tropic Motors | Springy Motors

#36

 Posted 17 August 2009 - 12:31 AM

that rust will just come back (in time)!!
it will come back, but not for a long time
---
4G63t, AWD, Widebody

---
4G63t, AWD, Widebody

---
#37

 Posted 17 August 2009 - 01:38 AM

yeah i know it will come back.
I'm getting the car re-sprayed next year and at the same time I'll be putting a new skin on it.
This is only a temp fix until then.
I'm getting the car re-sprayed next year and at the same time I'll be putting a new skin on it.
This is only a temp fix until then.
#38

 Posted 17 August 2009 - 02:24 AM

yeah i know it will come back.
I'm getting the car re-sprayed next year and at the same time I'll be putting a new skin on it.
This is only a temp fix until then.
sweeeeeeeeeet
Dan | Melbourne | 1994 CD5A / CE9A / E39A bastard child
special thanks to - TRIKFAB | Tropic Motors | Springy Motors

special thanks to - TRIKFAB | Tropic Motors | Springy Motors

#39

 Posted 23 August 2009 - 08:40 AM

Well I got my arse into gear this weekend to finish off the roof....
Grinded back the remainder of the rust, there wasnt too much so it wasnt too bad, repeated the same process as before, and blocked it back and painted it today.
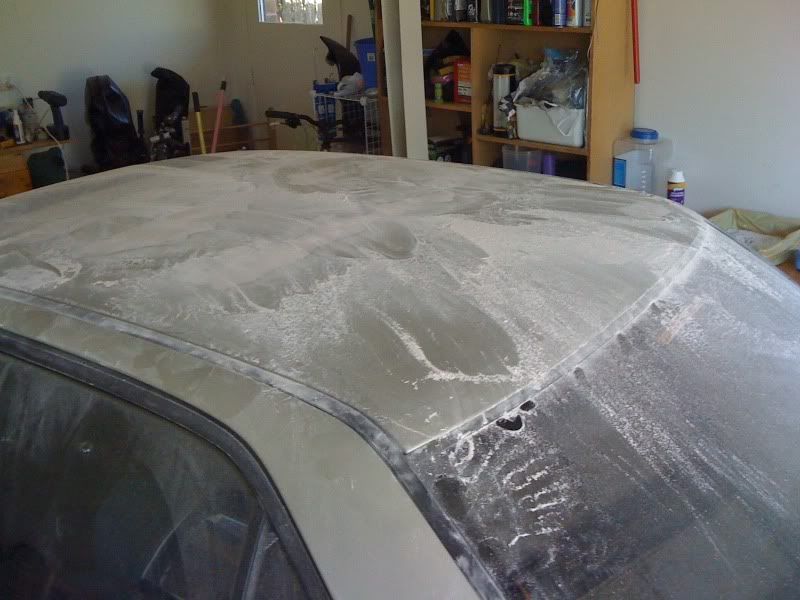
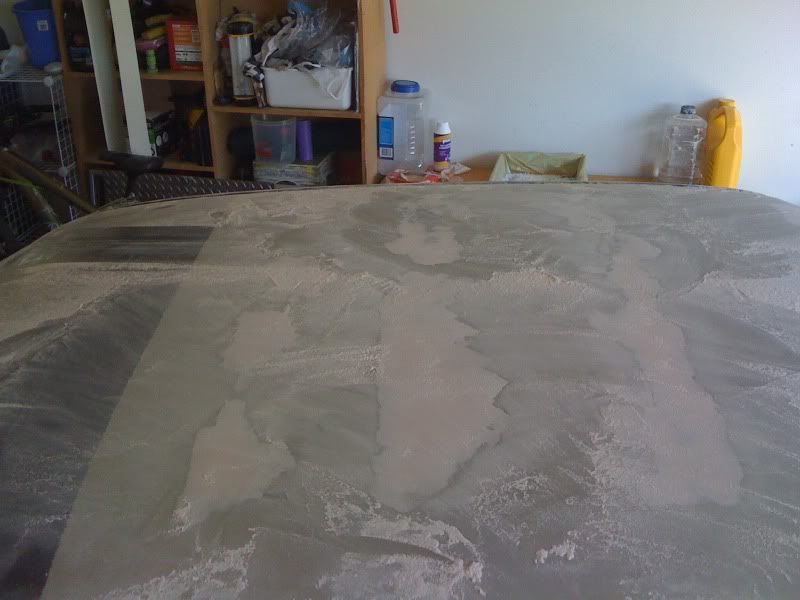
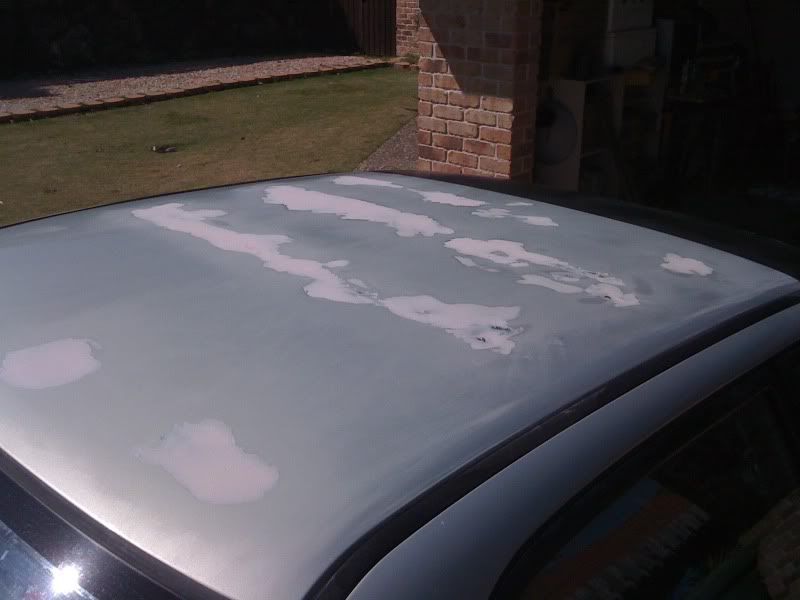
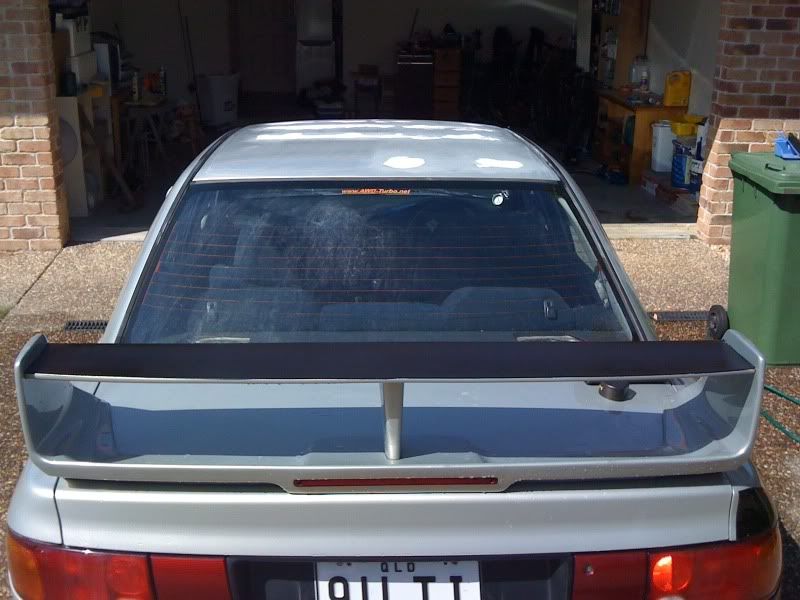
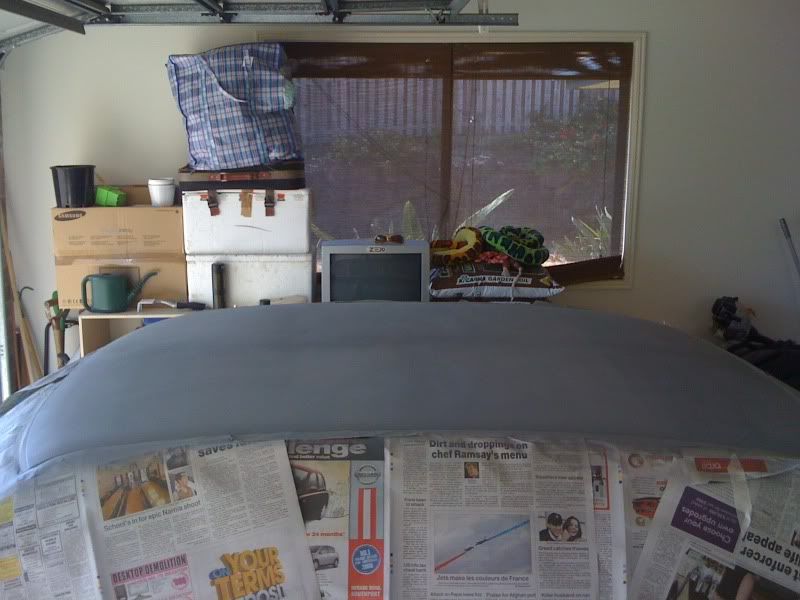
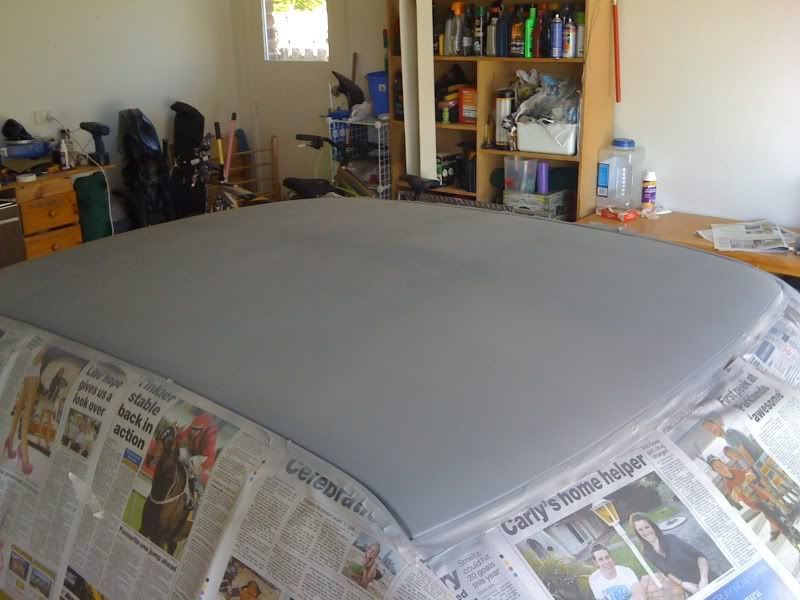
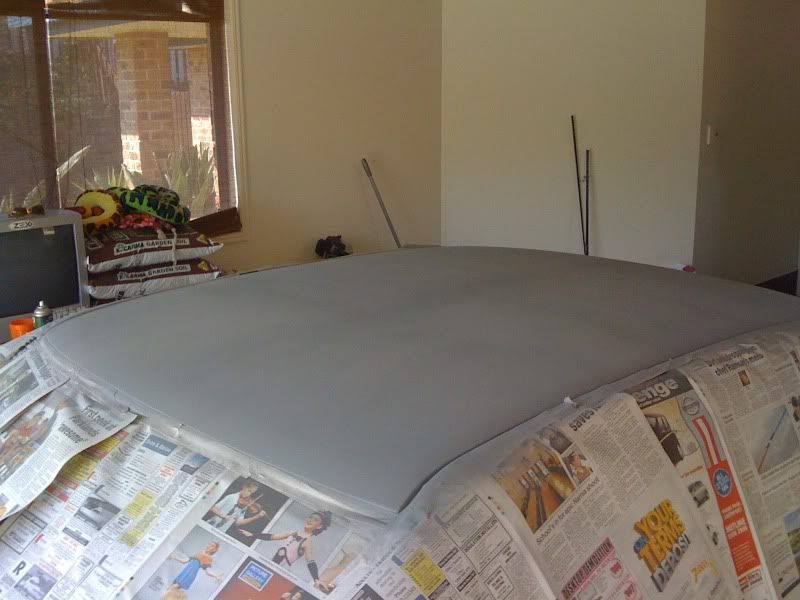
Finished result... after a wash
While i was going, I also blocked back the top of the wing as the clear had started to bubble and turn to shit. So I've done this in black for the time being to match the roof.
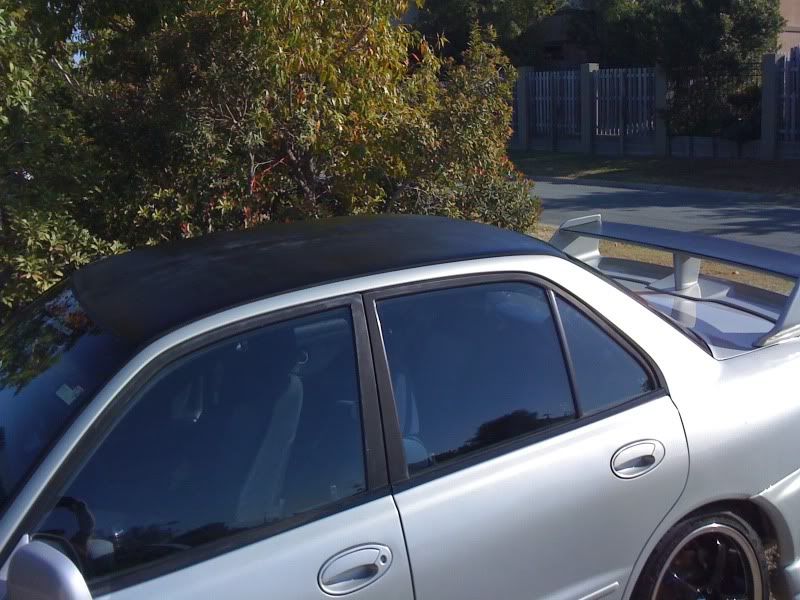
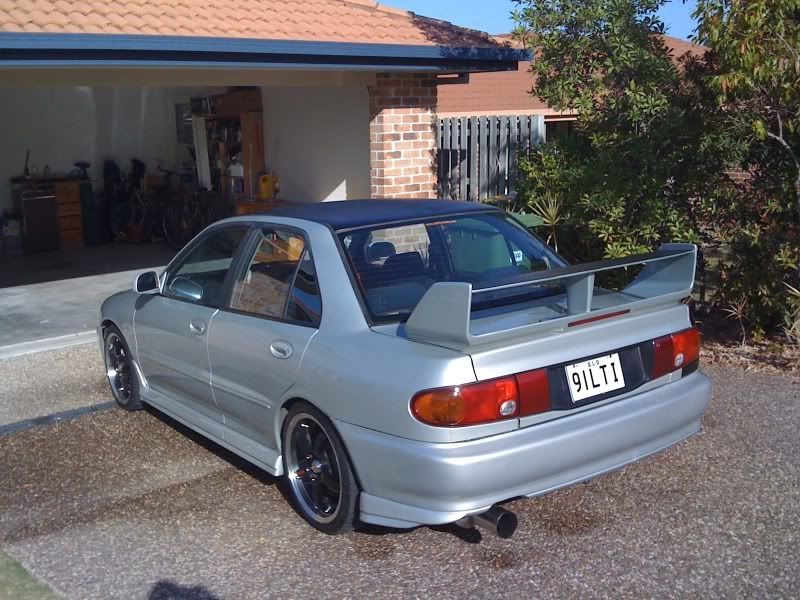
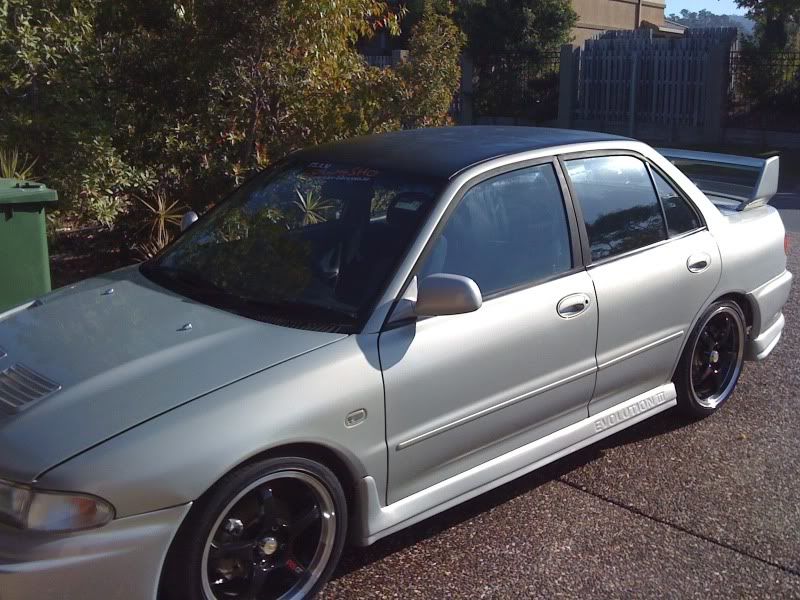
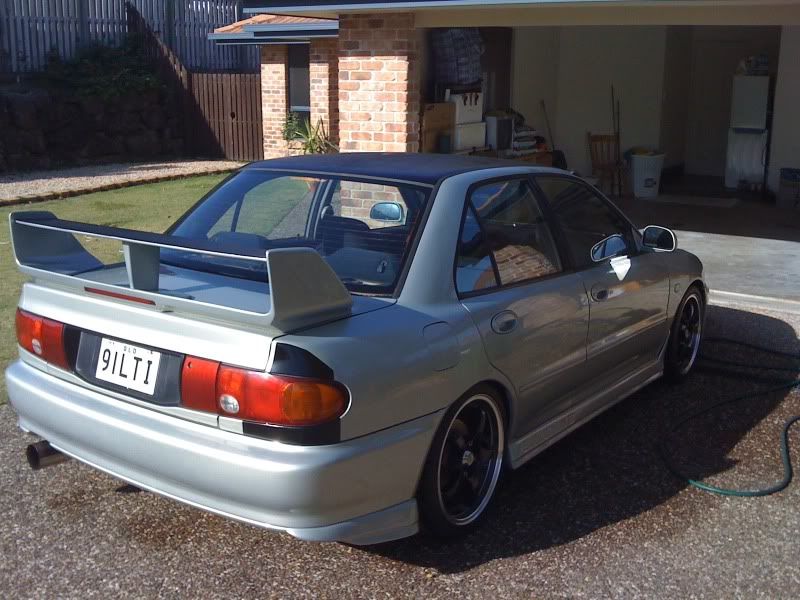
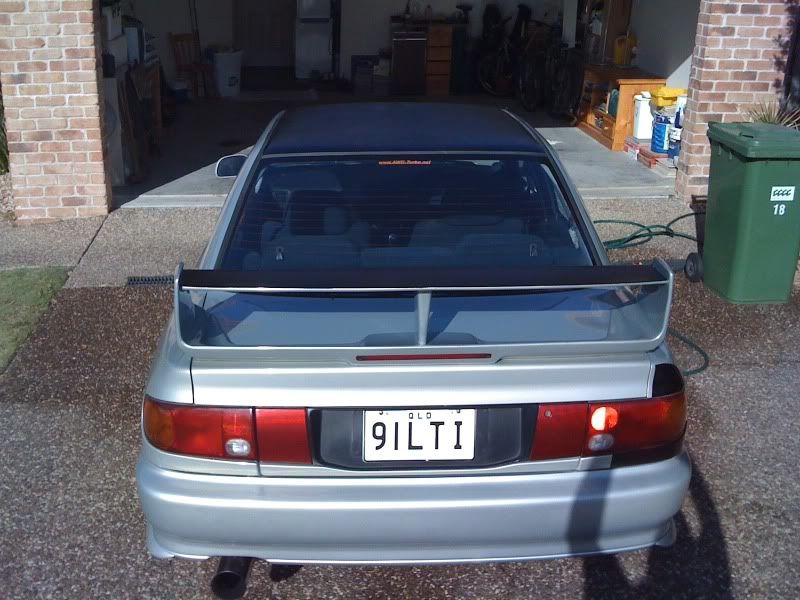
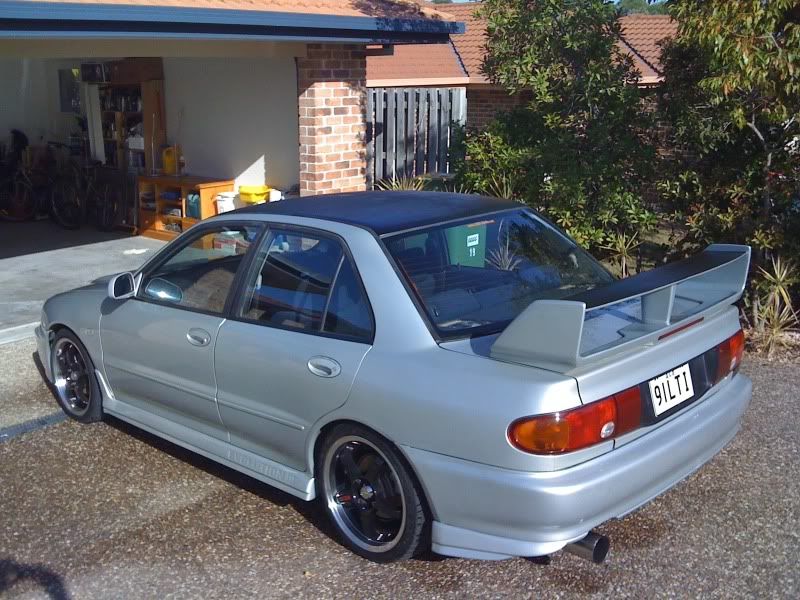
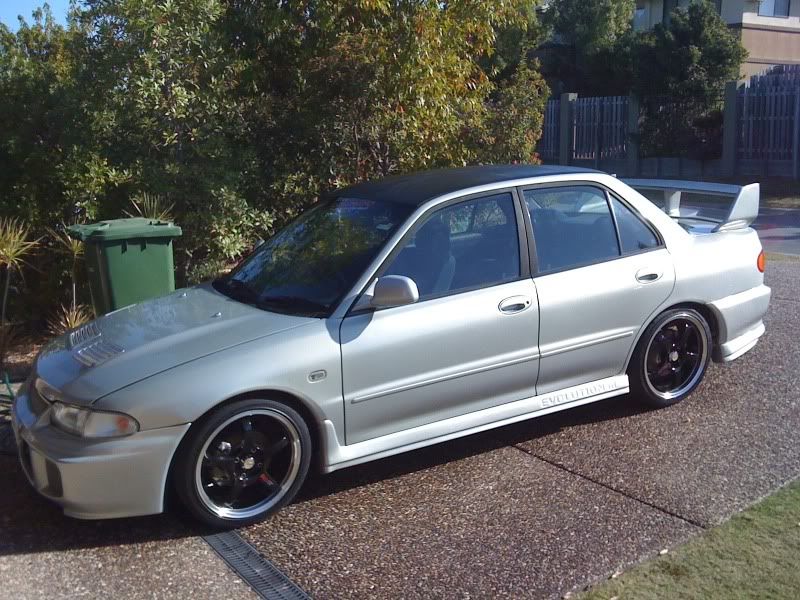
So the roof is all done for the time being. I am going to start looking for a new roof skin and just put it aside until I paint the car next year.
Next up will be finding a new front lip or fixing up the munted one I have in the garage.
Grinded back the remainder of the rust, there wasnt too much so it wasnt too bad, repeated the same process as before, and blocked it back and painted it today.


Finished result... after a wash
While i was going, I also blocked back the top of the wing as the clear had started to bubble and turn to shit. So I've done this in black for the time being to match the roof.


So the roof is all done for the time being. I am going to start looking for a new roof skin and just put it aside until I paint the car next year.
Next up will be finding a new front lip or fixing up the munted one I have in the garage.
#40

 Posted 30 August 2009 - 08:32 AM

OK well I spent this morning re-painting the door frames black and it looks much better. Also painted the windscreen wipers black again too, looks much cleaner now.
Had the back quarter painted too to patch up the black after I fixed the damage to the rear drivers side.
Typical silver colour, you can see the change in colour, but it will do until the car is painted.
anyway, here is some crappy pics I got this arvo on the phone...
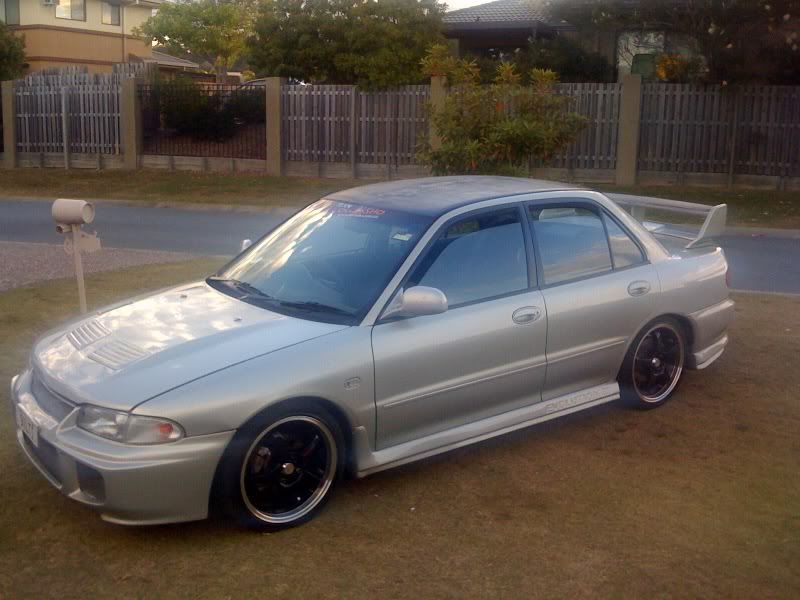
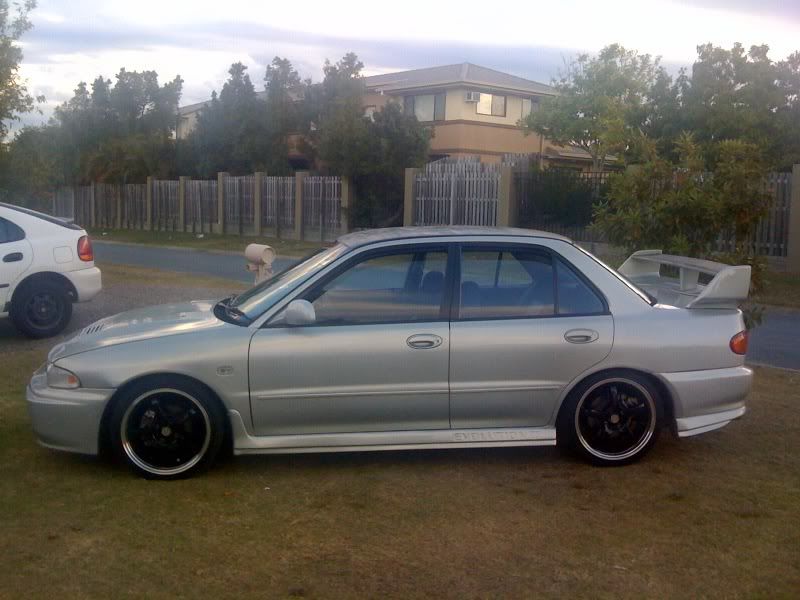
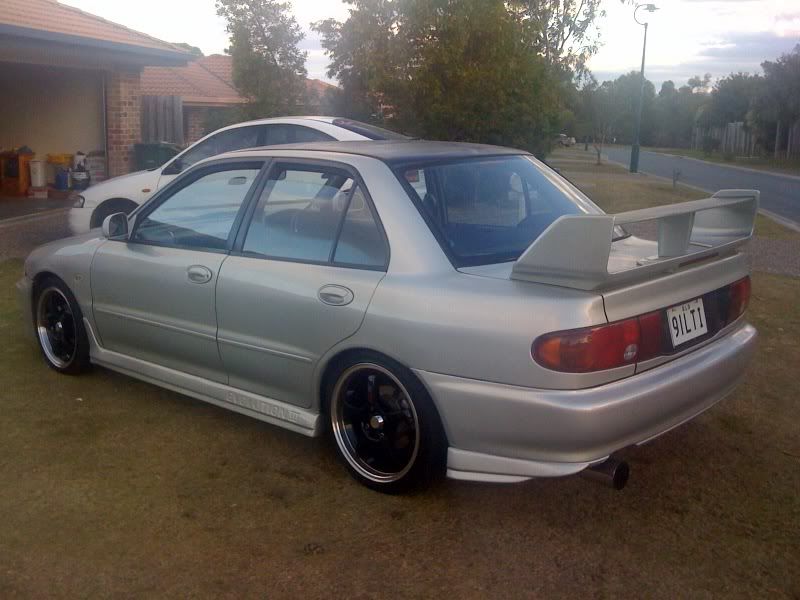
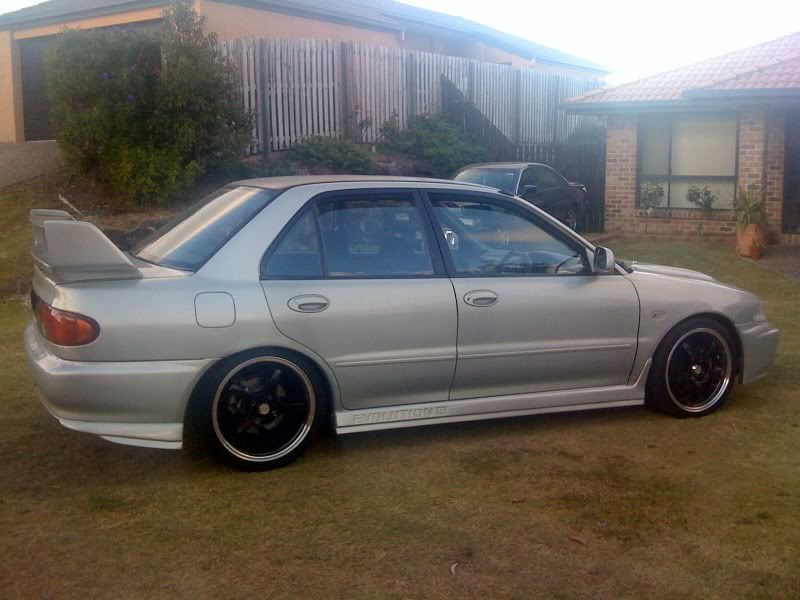
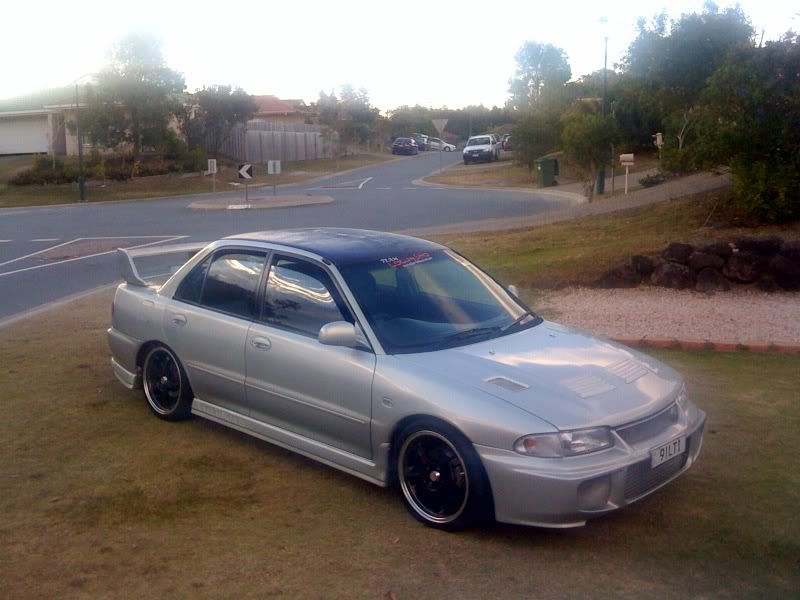
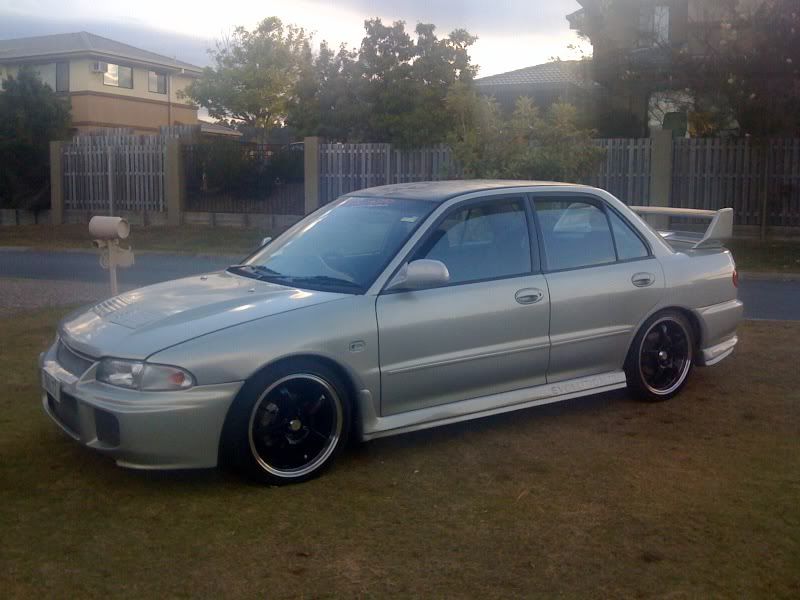
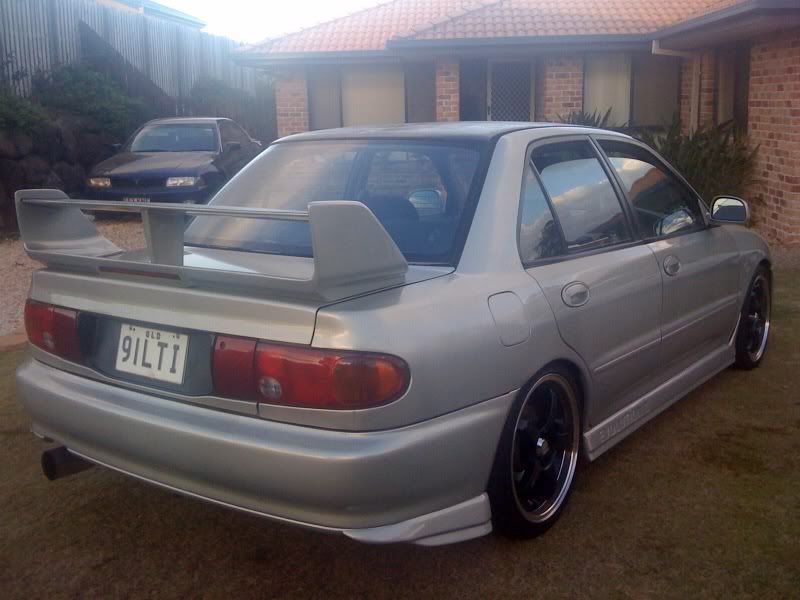
Had the back quarter painted too to patch up the black after I fixed the damage to the rear drivers side.
Typical silver colour, you can see the change in colour, but it will do until the car is painted.
anyway, here is some crappy pics I got this arvo on the phone...


0 user(s) are reading this topic
0 members, 0 guests, 0 anonymous users


 Back to top


