Jump to content

Welcome to 4GTuner
Register now to gain access to all of our features. Once registered and logged in, you will be able to create topics, post replies to existing threads, give reputation to your fellow members, get your own private messenger, post status updates, manage your profile and so much more. If you already have an account, login here - otherwise create an account for free today!
Photo

Custom Air Box

- - - - - My version

  • Please log in to reply
8 replies to this topic

#1
VIN18M

VIN18M

    Advanced Member

  • Active Members
  • PipPipPip
  • 1,209 posts
  • LocationSydney
So after coming on here and constantly asking questions of people I've decided to add something constructive to hopefully help people out.

I had a crack at a custom air box over the weekend and am most of the way through it, I just need to finish the lid and give it a coat of black paint and it'll be done.

I figured this is something people ask about quite often and to be honest it's not that difficult.

This is in preparation of my forged 4g93t going into my Satria GTi in the next couple of months, I will not be running an air flow meter and will have a 4" pipe running directly to the pod filter.

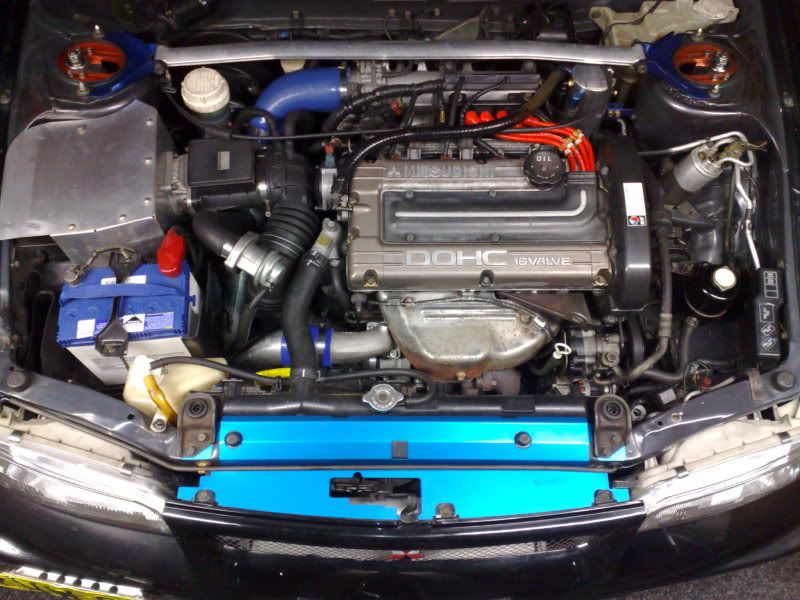
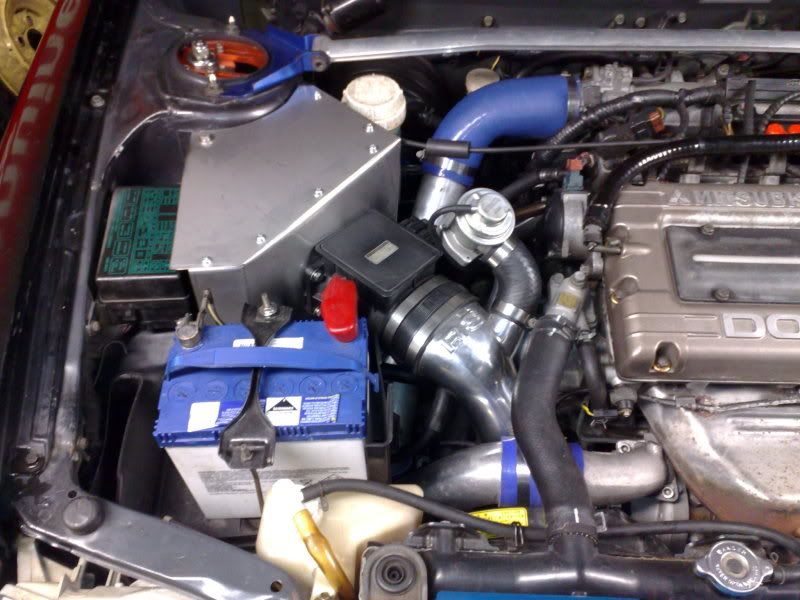
Below is an image of my current setup, the filter and battery will be swapping positions when the new engine goes in.
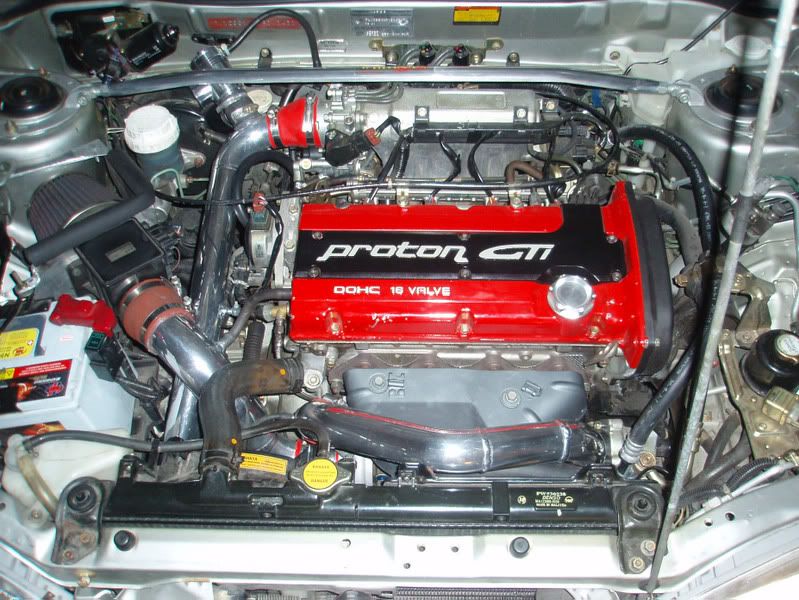
Posted Image


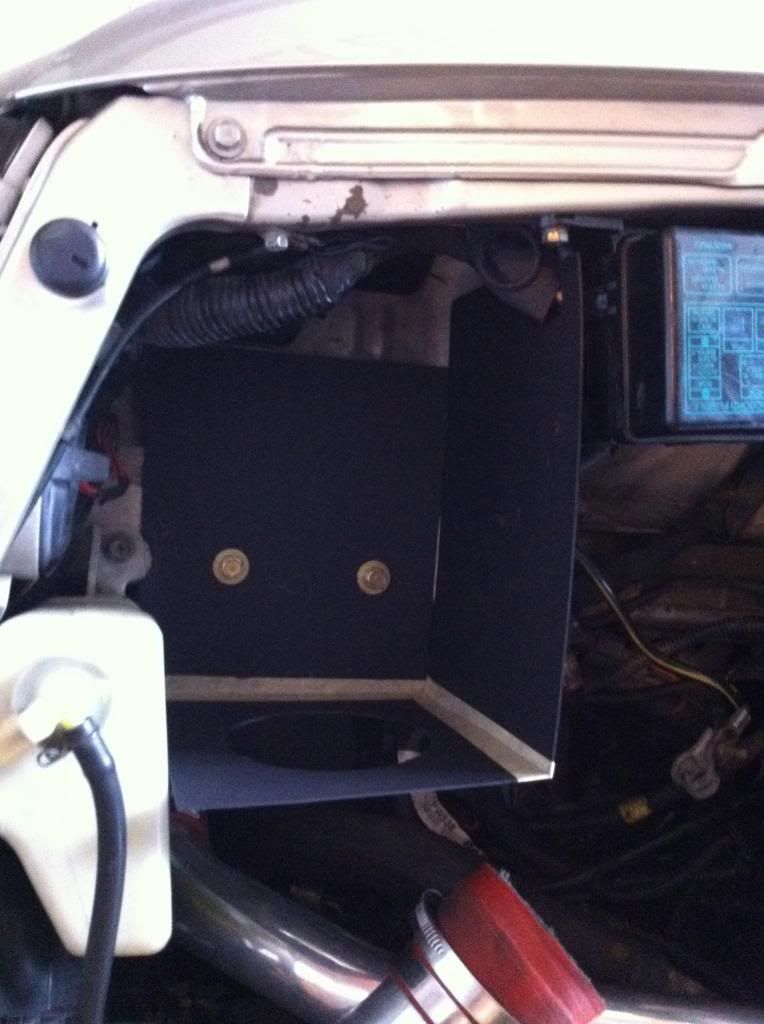
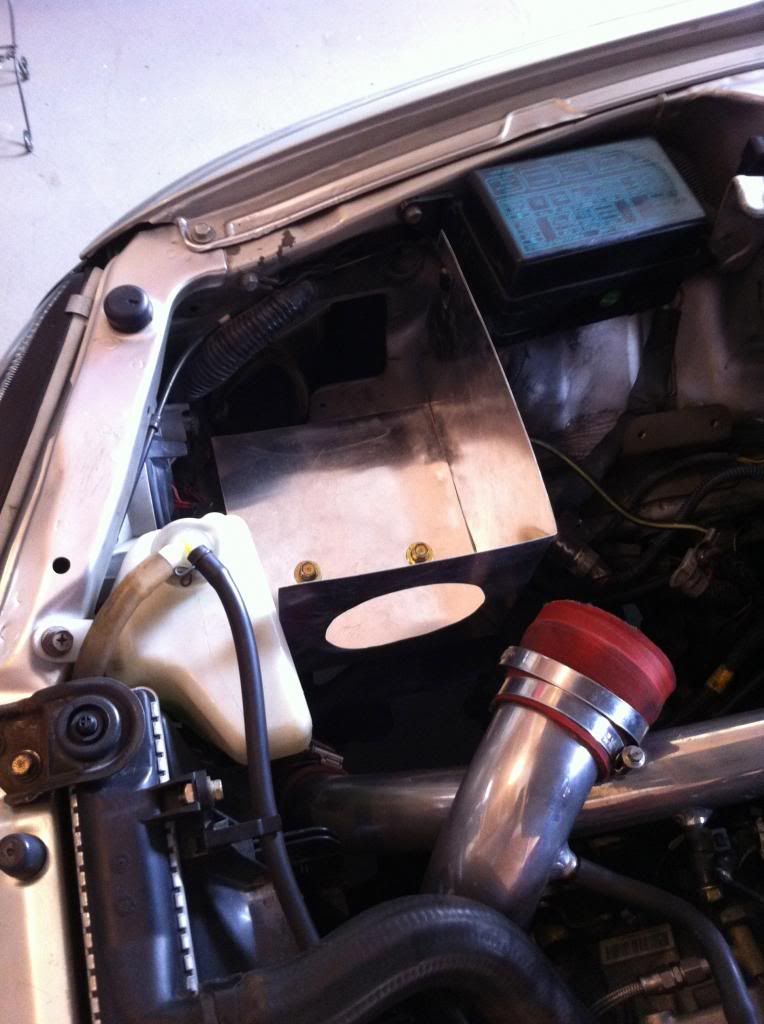
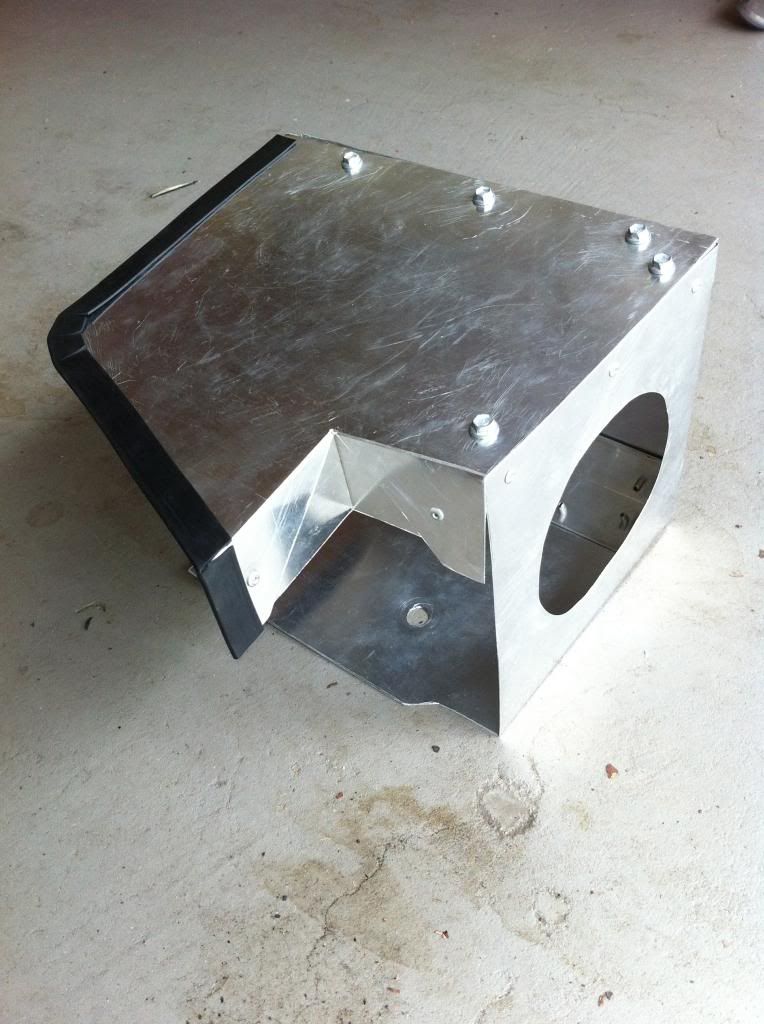
First I created a cardboard template to fit in behind the headlamp, I'm using the bolts that held the batter tray in to hold the box in place. Having a 4" intake pipe, I've made the hole 110mm diameter so that I have room to run a rubber strip around the inside of the hole to prevent it rubbing.
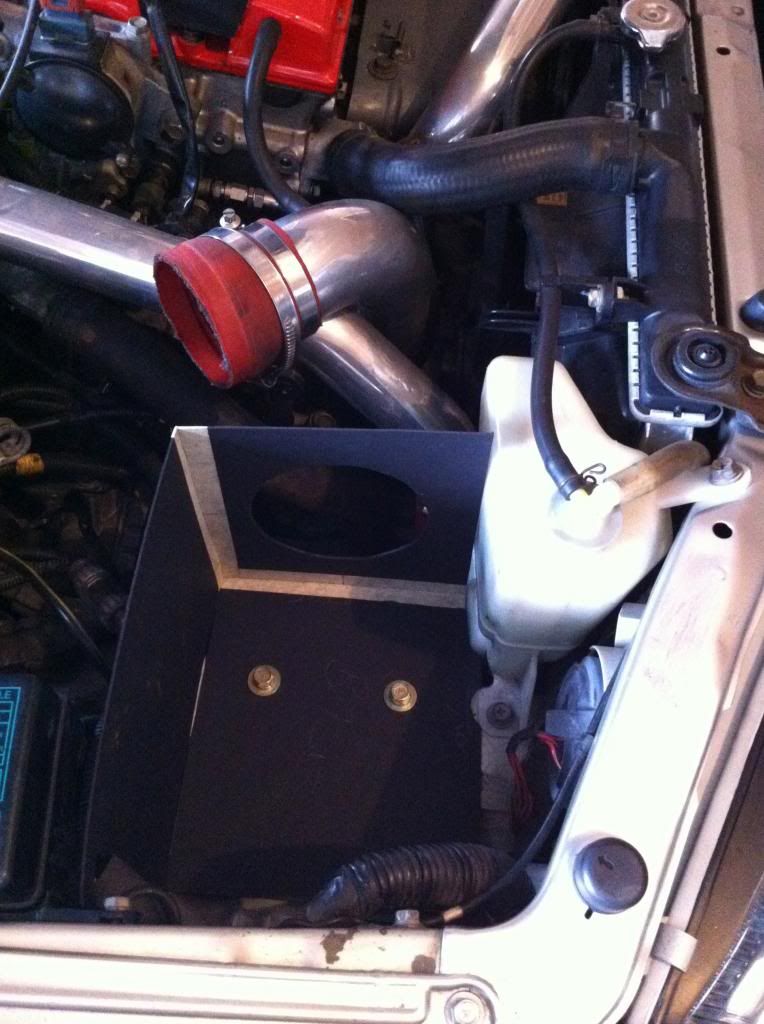
Posted Image


Different angle...

Posted Image

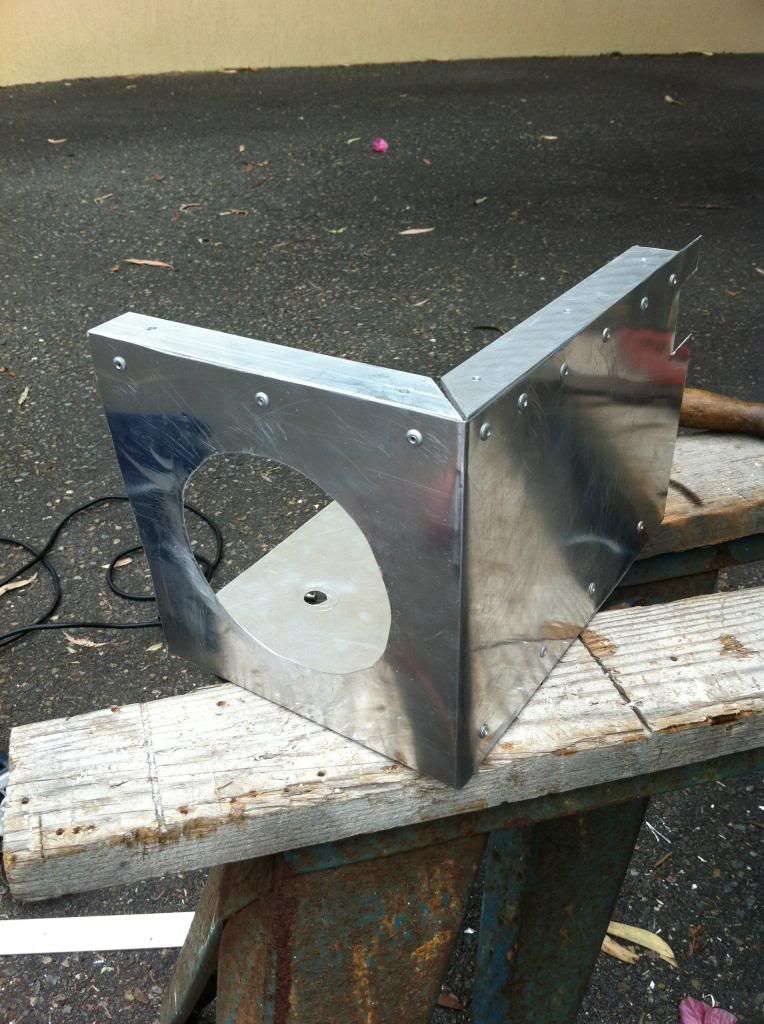
Then traced the template onto aluminium sheet and scored and folded to fit...
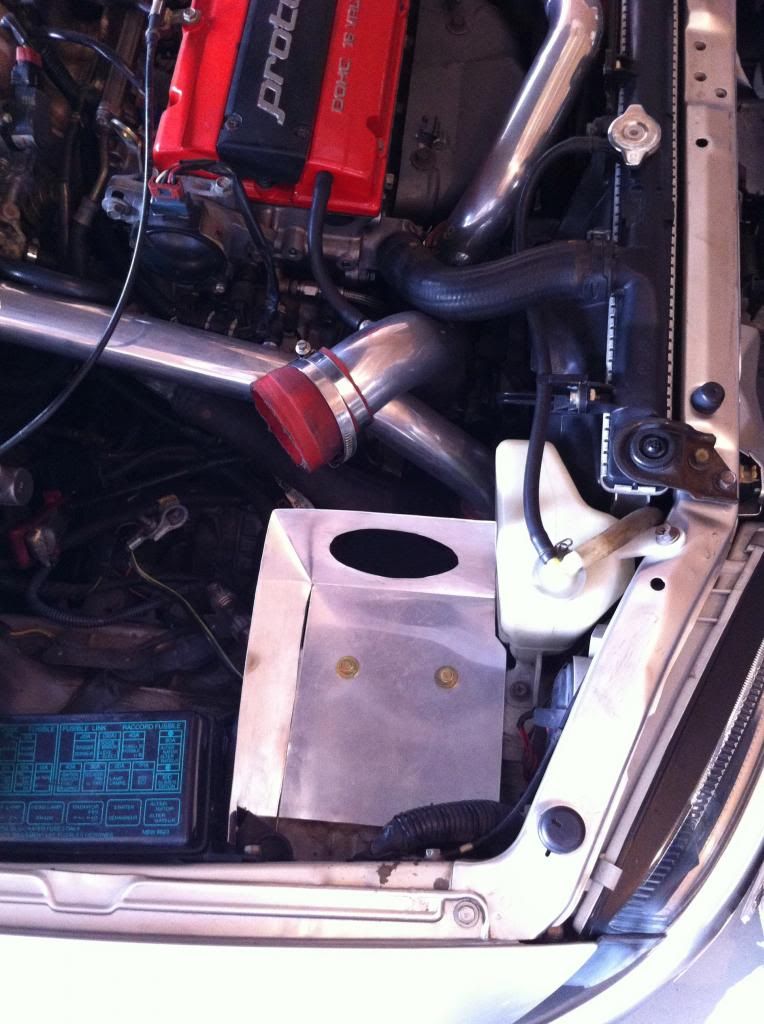
Posted Image

Posted Image

I riveted some aluminium angle to the top of the box for the lid to be screwed onto, this also helps make the thin aluminium a little stiffer and rigid.
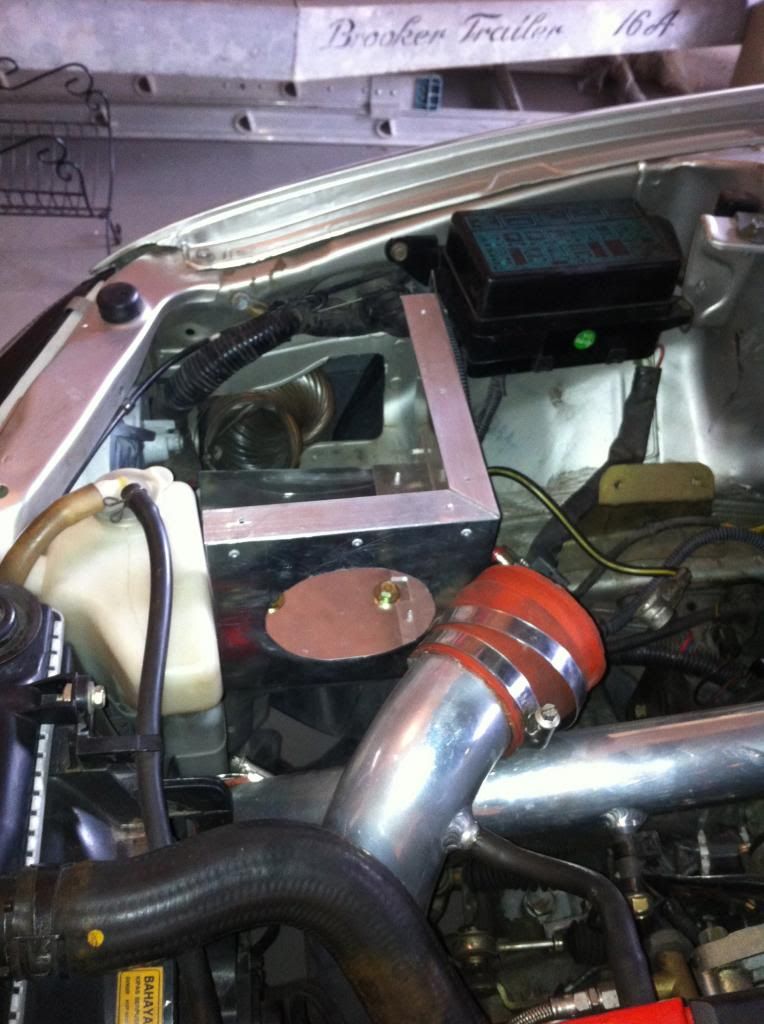
Posted Image

I used a larger profile of aluminium angle on the inside of the box to help stiffen it to avoid flex and hold everything square...
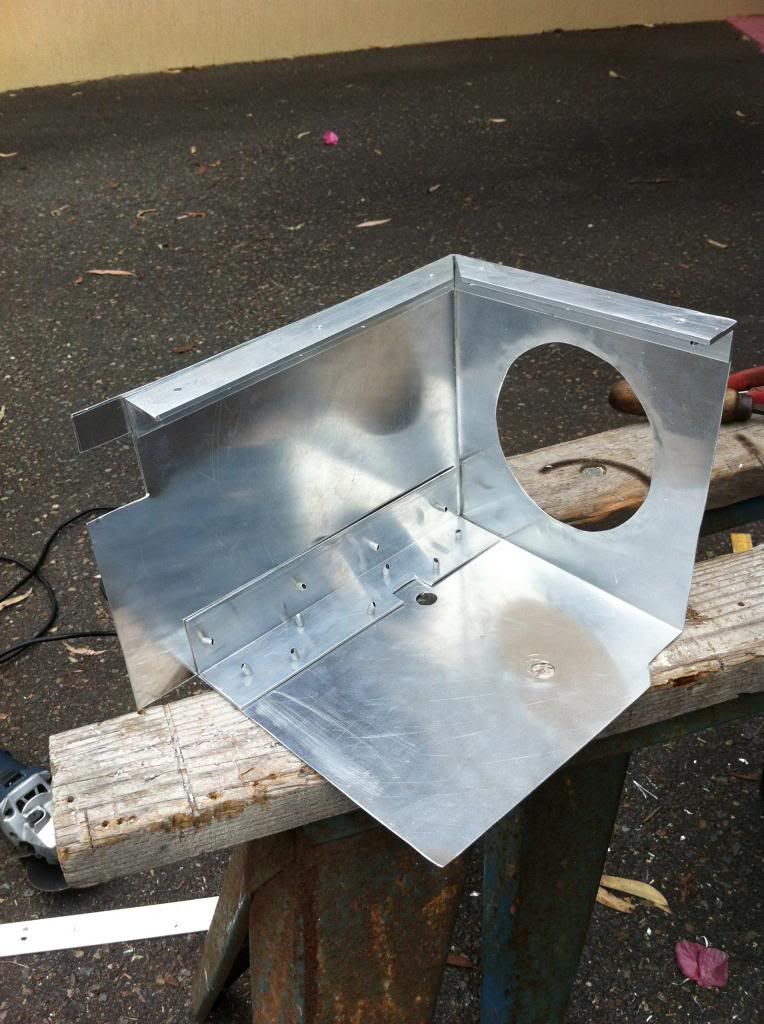
Posted Image


And the outside of the box...

Posted Image


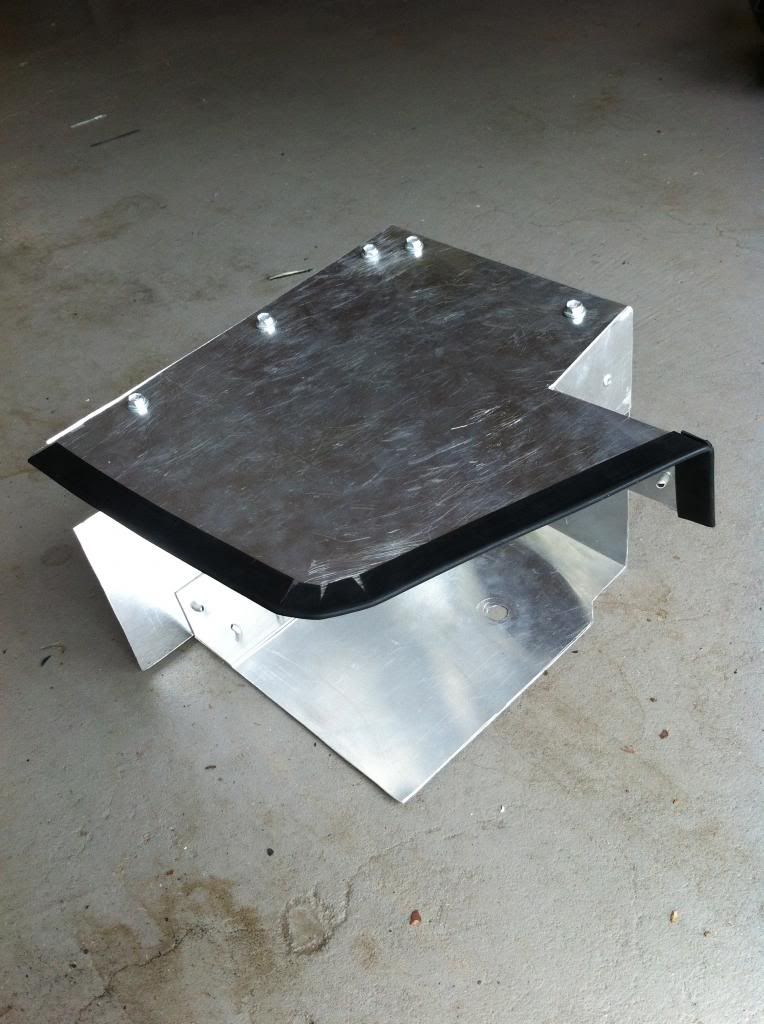
I then created a template for the top of the box to seal it all off. The final product will be painted matte black so this gives a good indication of how the box will look from the top once painted.
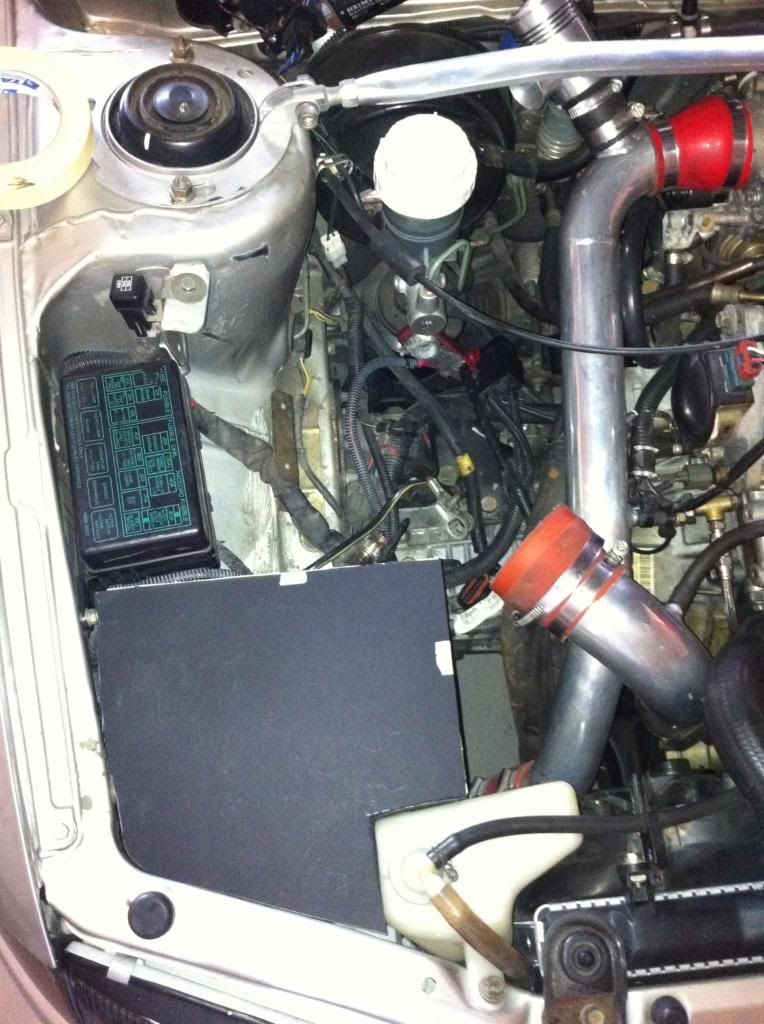
Posted Image


From this angle you can see that the aluminium will be folded down behind the radiator overflow for a neat finish.
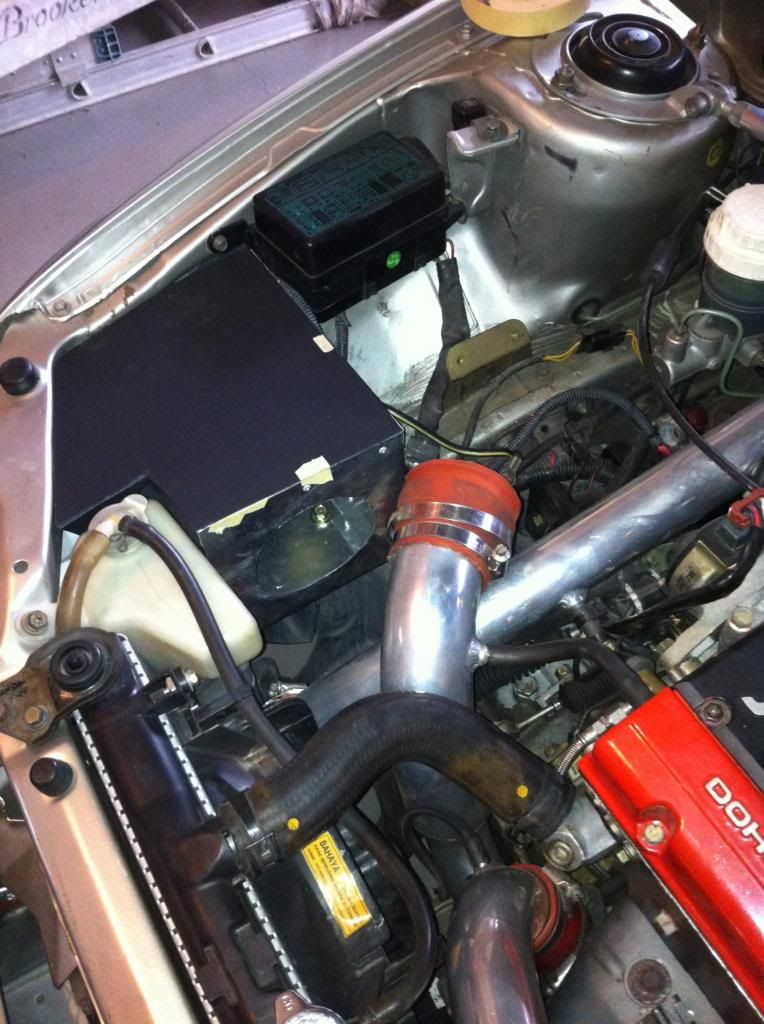
Posted Image

And that's where I'm up to, this weekend I'll be cutting and shaping the lid, I'll also be running rubber bead around the hole to protect the piping and across the front of the lid so it doesn't rub against the frame above the headlamp.

More to come after the weekend...

#2
bazeng

bazeng

    Gday maaaate

  • Active Members
  • PipPipPip
  • 9,899 posts
  • LocationMelbourne
Good job!

#3
jack be nimble

jack be nimble

    master of none

  • Donating Members
  • PipPipPip
  • 8,301 posts
  • Locationperth sor. 20 mins from brians place
Looks good. Good effort.

My proton had a trumpet in the fog light hole and ducting into the standard airbox.
Now I have boxed off the rh area infront of the wheel. The filter is in there, and air enters through the rh hole in the evo3 bar.
Dougmo would be proud, (except it's not up to his high workmanship standards)
4g93t jumbuck conversion. PRANGED 18/3/12, CHECK MY MEMBER RIDES Page 11. no serious human injuries.
ON THE ENGINE STAND. g4cs 2.4l + Gt35r. PLUS: auto conversion + Awd coming.
thanks for parts and help: BMGTZ, EVOCPE, cwolf, Benozi, Jamo-GSR, 1JUM2NV, RXVII..much appreciated, cheers guys.
Aerodynamics are for people who can't build engines. —Enzo Ferrari
REMEMBER: you cant polish a turd, but you can roll it in glitter.

#4
VIN18M

VIN18M

    Advanced Member

  • Active Members
  • PipPipPip
  • 1,209 posts
  • LocationSydney
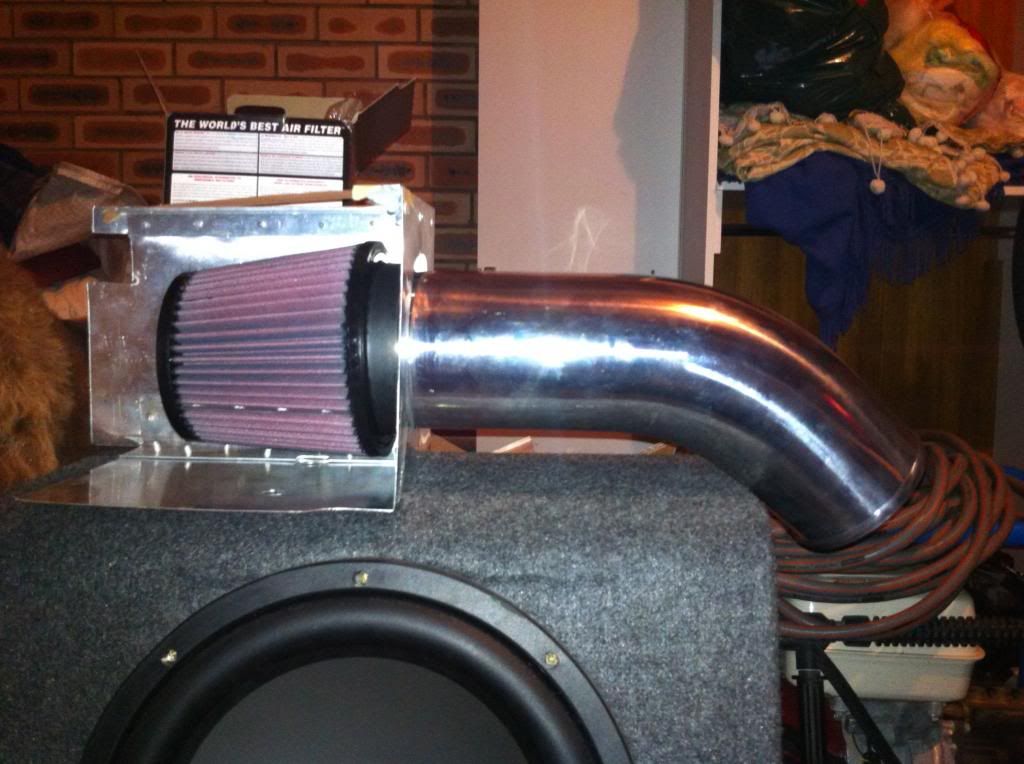
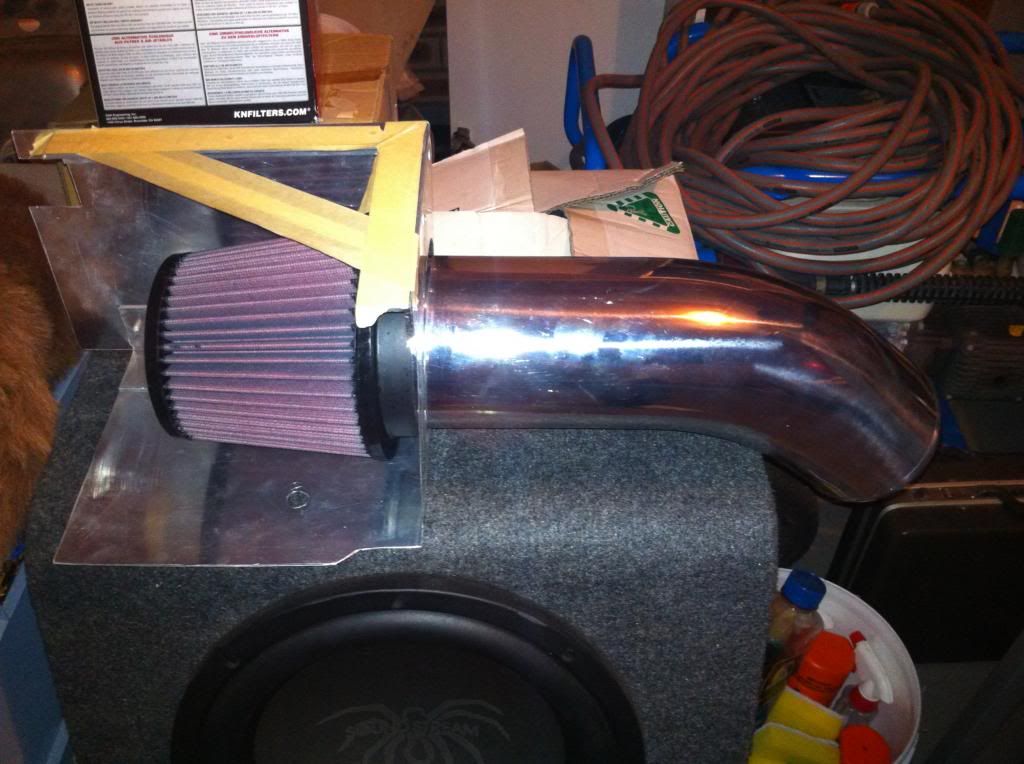
Bit of an update, the 4" pipes I ordered came in on Monday so I put the new K&N pod on and just checked everything was fitting ok. The 4" pipe looks massive in comparison to the 3" one I have on there at the moment, but it should flow and sound awesome!

I bought two of these 45 degree bends so should be able to make this meet up with the turbo inlet, just need to get a 4"-2.25" reducer which is proving to be quite expensive. The FP ones are $96 delivered!

Posted Image


Ignore the masking tape, it's just holding the box square until the lid is put on.

Posted Image

Edited by VIN18M, 22 January 2013 - 10:16 PM.


#5
VIN18M

VIN18M

    Advanced Member

  • Active Members
  • PipPipPip
  • 1,209 posts
  • LocationSydney
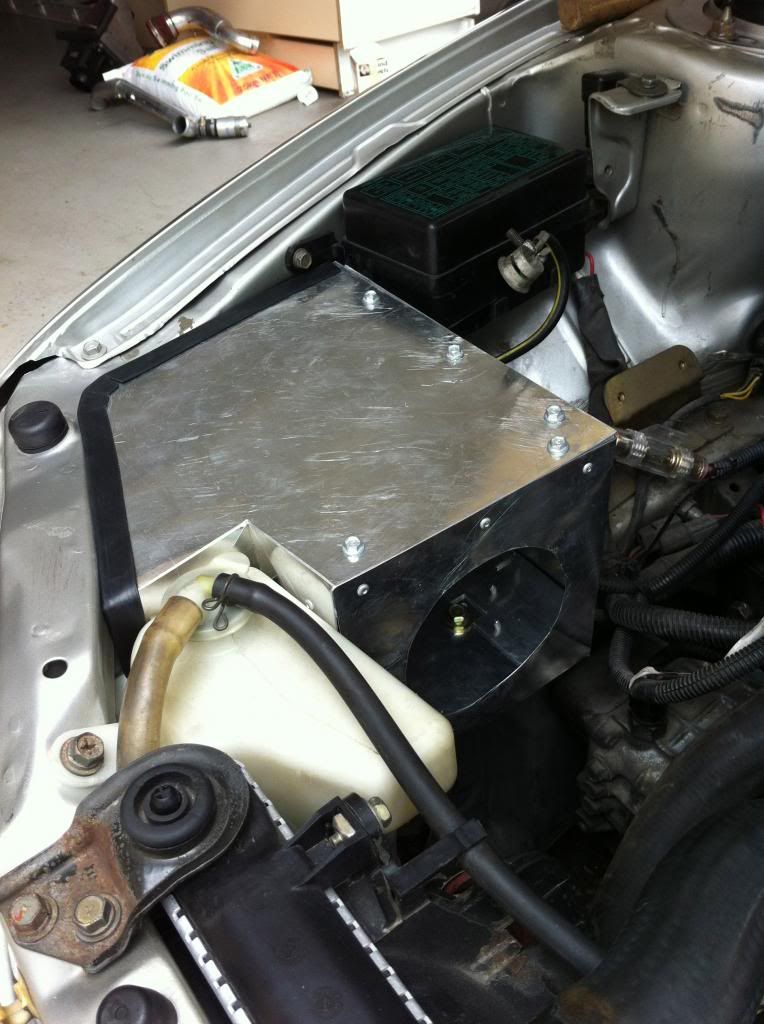
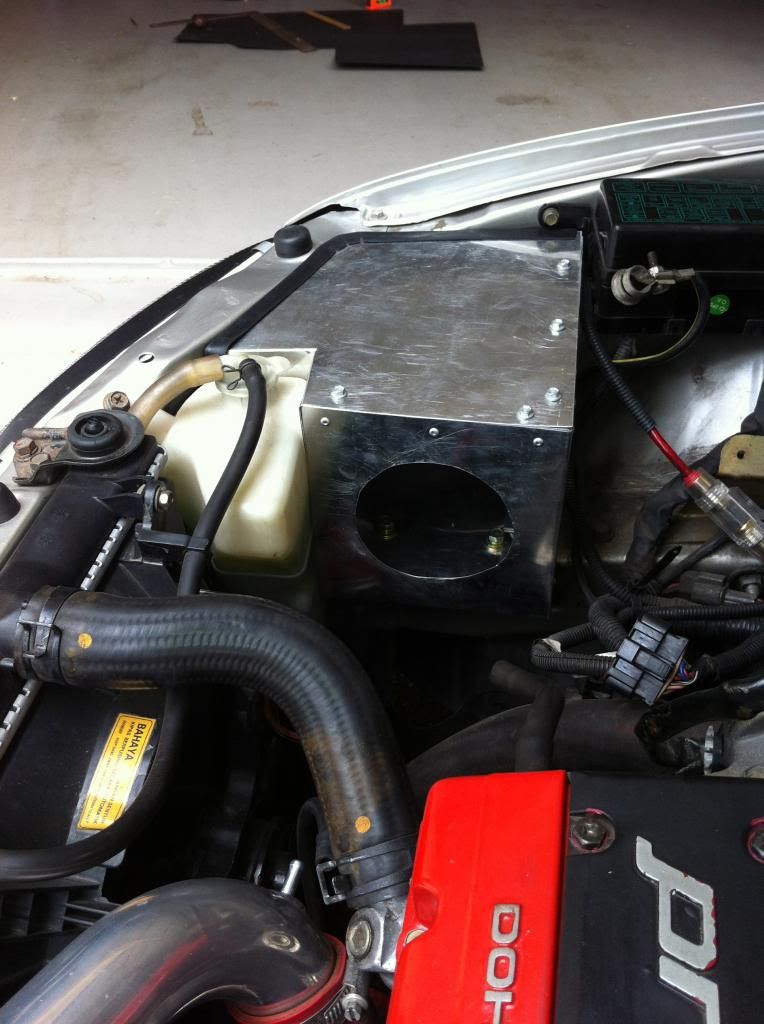
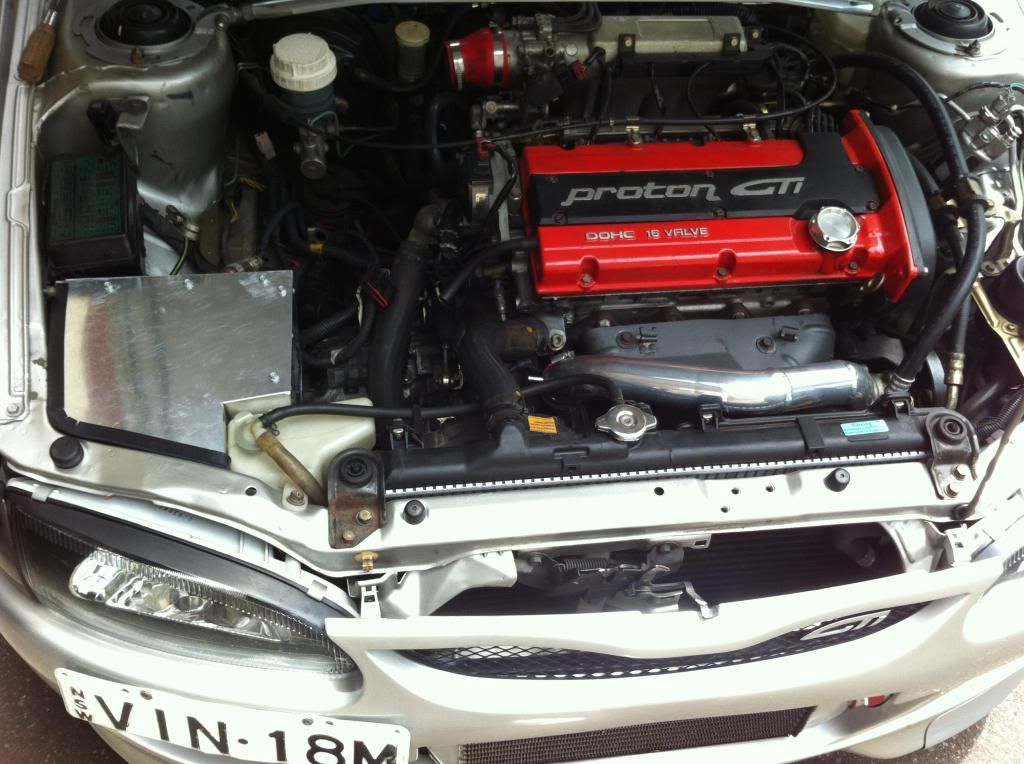
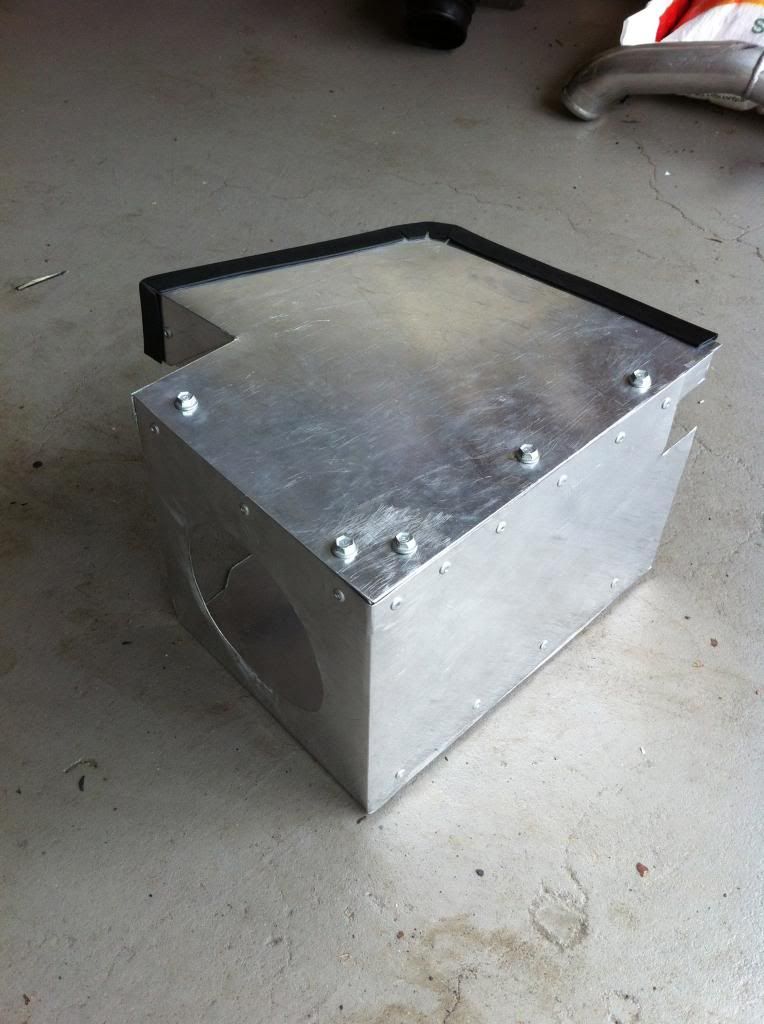
More updates, box is basically finished except for the paint, I'll be starting working on the 2.5" cold side piping this week but won't be finishing off the intake pipe as I'll have to wait and see where the td05 sits once mounted to the manifold.

Again, it's not perfect but should do the job...

Posted Image

Posted Image

Posted Image

Posted Image

Posted Image

Posted Image

#6
FrontLever

FrontLever

    Member

  • Members
  • PipPip
  • 24 posts
  • LocationCanberra
Looks neat! Do you monitor intake temps? any noticeable improvement?

#7
VIN18M

VIN18M

    Advanced Member

  • Active Members
  • PipPipPip
  • 1,209 posts
  • LocationSydney
Haven't run it on the car yet, this is in preparation for the new engine. At the moment my battery is located where this airbox is and the intake pipe diects behind the battery.
Not sure how much of a difference in intake temps I'll have, it's more for legal purposes really, but it should help a bit.

#8
croket

croket

    Advanced Member

  • Active Members
  • PipPipPip
  • 734 posts
  • Locationwestern australia
very nice ill be doing the same with my vr4 but i have a 4 inch pipe going under air box and thru the front skirt directly inline with a bumper vent should breathe nice and cold

#9
Liberoz

Liberoz

    Advanced Member

  • Active Members
  • PipPipPip
  • 2,831 posts
  • LocationSydney
here was mine in the factory pipe and a flipped upside down CP9A box with custom lid
Posted Image

here was mine in the factory location useing HKS intake pipe
Posted Image

Edited by Liberoz, 17 June 2013 - 04:15 AM.

John
CE9W RIBEROGT RANSAEBO II

RRF | 0Z Racing | RALLI/// ///ART | Sparco | MEEK | Elf | Fujitsubo | Marle Pistons
| HKS-RS Intake | Cusco | Apexi | PUMA | Dia Queen | GIII's | Hibrid III | MMC | GReedy TRUST | Camtech | RECARO| RSEII Spec | RALLIART Options inside | Walbro


0 user(s) are reading this topic

0 members, 0 guests, 0 anonymous users